Are you concerned about the security of your Windows PC? One way to protect your computer is to disable Windows PowerShell and Command Prompt, considered double-edged swords.

Although they help administrators and developers perform different tasks, malicious actors can also use them to compromise your data. To stop that from happening, you must turn off these command-line tools when not in use. We’ll show you how to disable Windows PowerShell and Command Prompt. So, let’s begin.
Why Should You Disable Command Prompt and Windows PowerShell
Disabling powerful command-line tools like Command Prompt and Windows PowerShell can be an effective method to enhance the security of your system and protect it from malicious threats. Here are some important reasons why you should disable Windows PowerShell and Command Prompt:
- Malicious agents can use Command Prompt and PowerShell to launch malware attacks and run harmful scripts on your computer.
- An inexperienced user may unintentionally run some commands in these command-line tools that can make your system unstable.
- These tools can be used to gain administrative access to the system and lead to malware attacks.
How to Disable Windows Command Prompt
There are two methods to disable the Windows Command Prompt on your computer: one is through the Registry Editor, and the other is through the Local Group Policy Editor. Let’s check out both methods in detail:
1. Using the Registry Editor
The Registry Editor contains registries you can configure to change the functioning of your system. By accessing the Command Prompt registry within it, you can configure the settings to disable the Command Prompt. Here’s how to do that:
Note: Editing the Registry involves risk, as one wrong move can harm your computer. To prevent that from happening, you must back up the registry and create a restore point. Doing this ensures you can easily restore your data if something goes wrong.
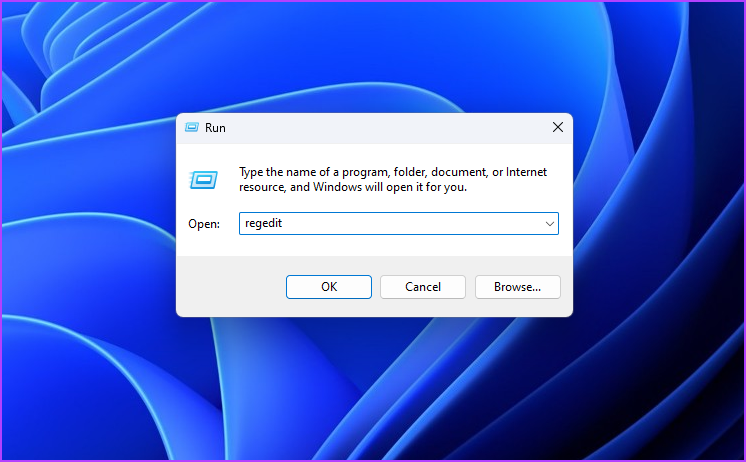
Step 1: Press the Windows + R keyboard shortcut to open the Run tool.
Step 2: Type regedit in the search bar and press Enter. This will open the Registry Editor.
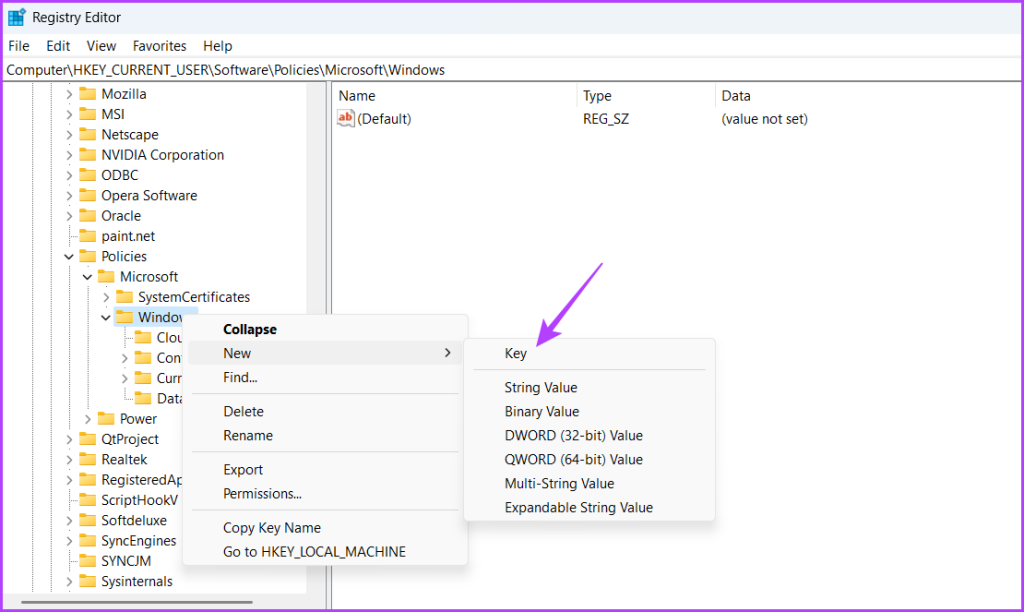
Step 3: In the Registry Editor, head toward the following location:
HKEY_CURRENT_USER\Software\Policies\Microsoft\WindowsStep 4: Right-click on the Windows key, hover the cursor on New and choose Key.
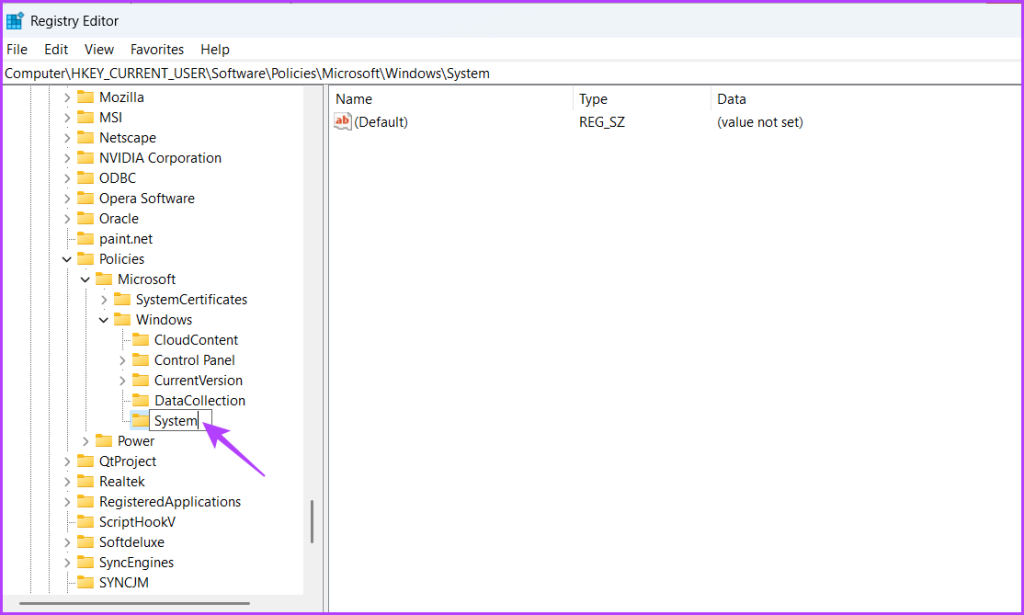
Step 5: Name the key System.
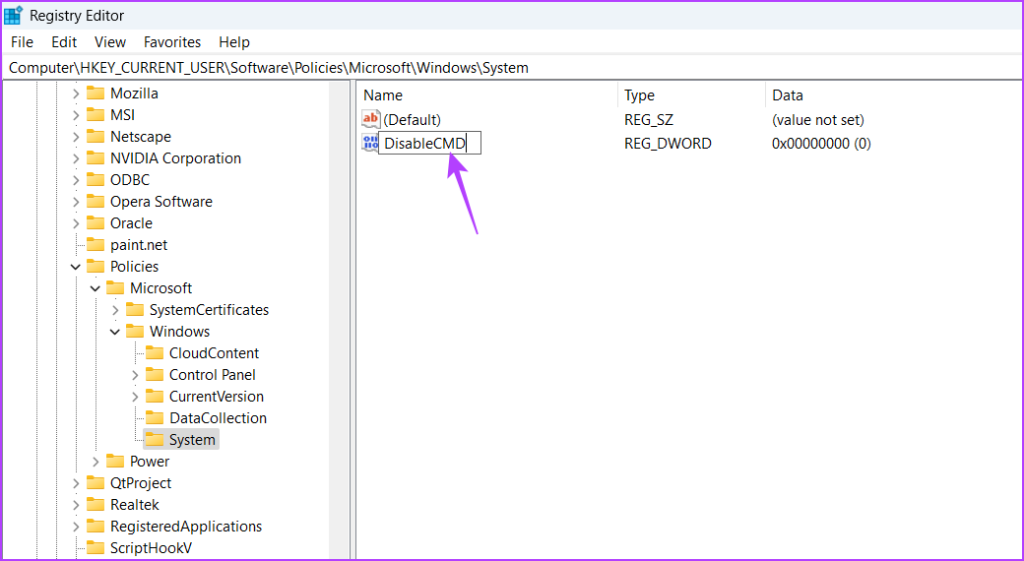
Step 6: Right-click on the System key, hover the cursor on New and choose DWORD (32-bit) Value.
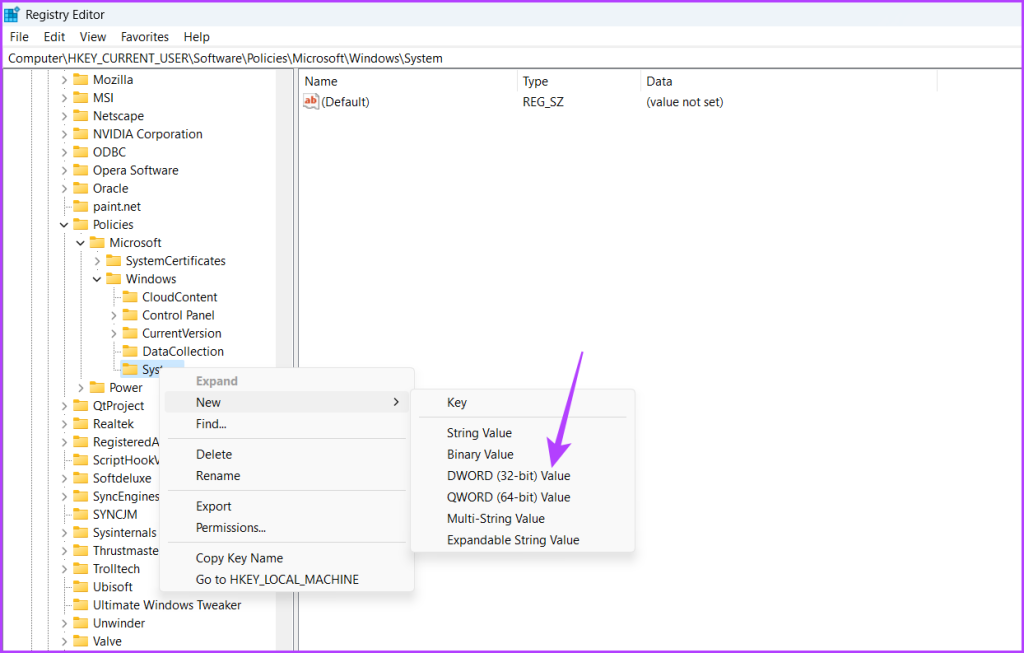
Step 7: Name the value DisableCMD.
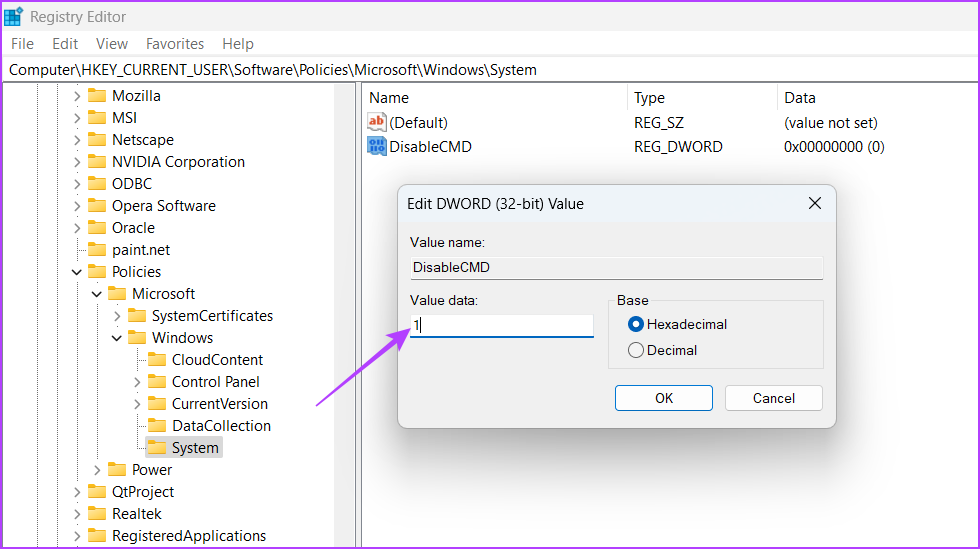
Step 8: Double-click on the DisableCMD value, type 1 in the Value data, and click OK. This will disable Command Prompt.
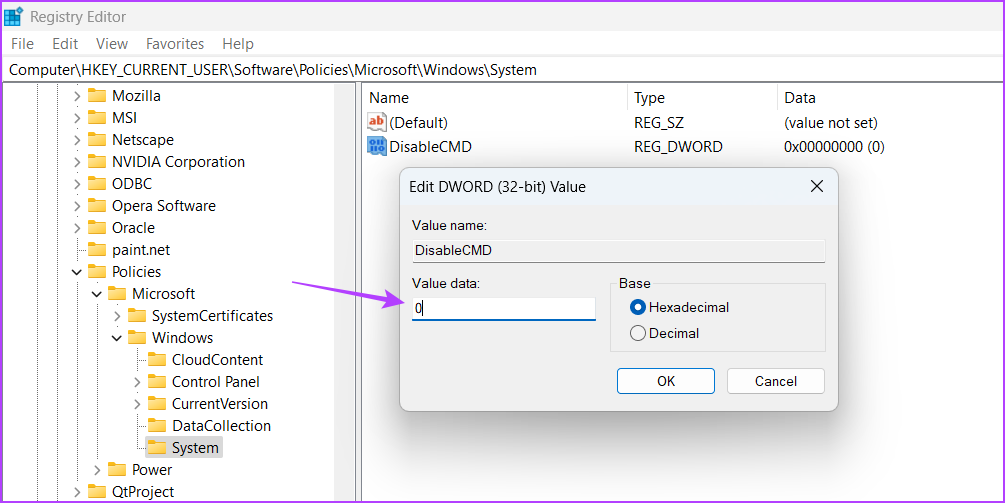
To enable Command Prompt, type 0 in the Value data and save the changes.
2. Using the Local Group Policy Editor
The Local Group Policy Editor is another important Windows tool that lets you configure your computer policies. You can use this tool to stop Command Prompt access for non-admin users. Follow these steps to do that:
Local Group Policy Editor is exclusively available for Windows Professional, Education, and Enterprise editions. If you’re using Windows Home edition, you’ll get an error message stating, ‘Windows cannot find gpedit.msc’ when trying to access the Local Group Policy Editor. Luckily, you can troubleshoot this error easily. Check our guide to fixing the gpedit.msc missing error and accessing the Local Group Policy Editor on Windows Home edition.
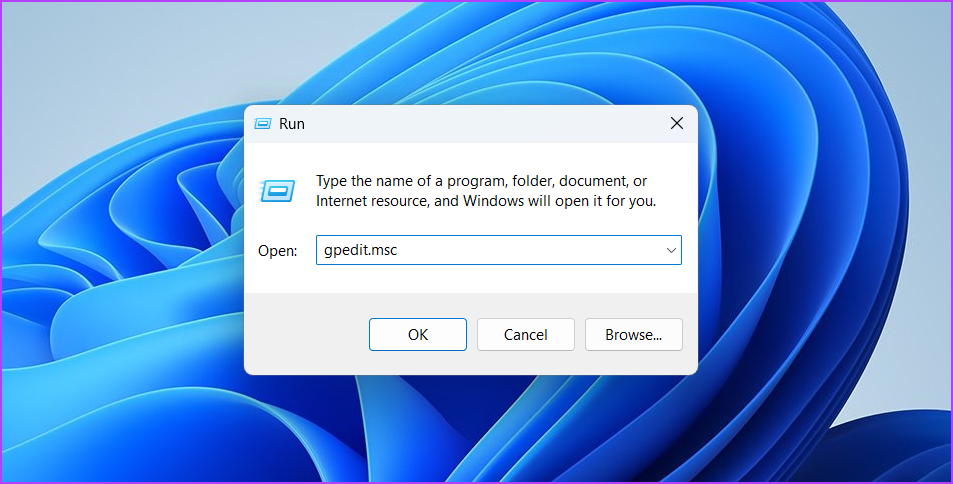
Step 1: Open the Run tool, type gpedit.msc in the search bar, and click the OK button.

Step 2: Head towards the following location in the Local Group Policy Editor:
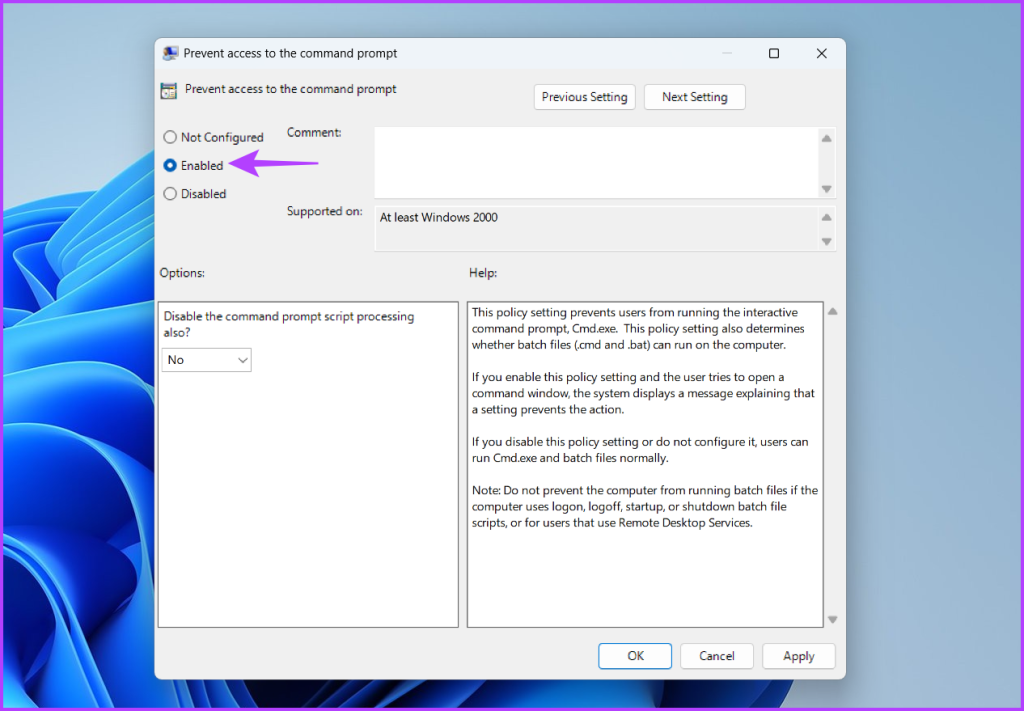
User Configuration\ Administrative Templates\ SystemStep 3: Double-click on the ‘Prevent access to command prompt’ policy in the right pane.
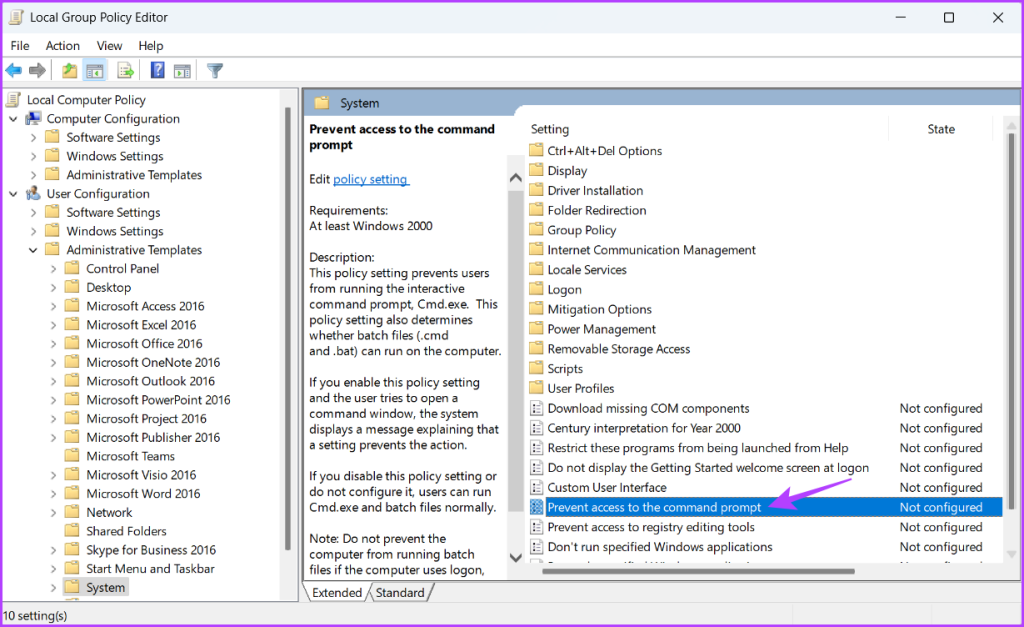
Step 4: Select the Enabled option. Then, click Apply and OK. This will disable Command Prompt.
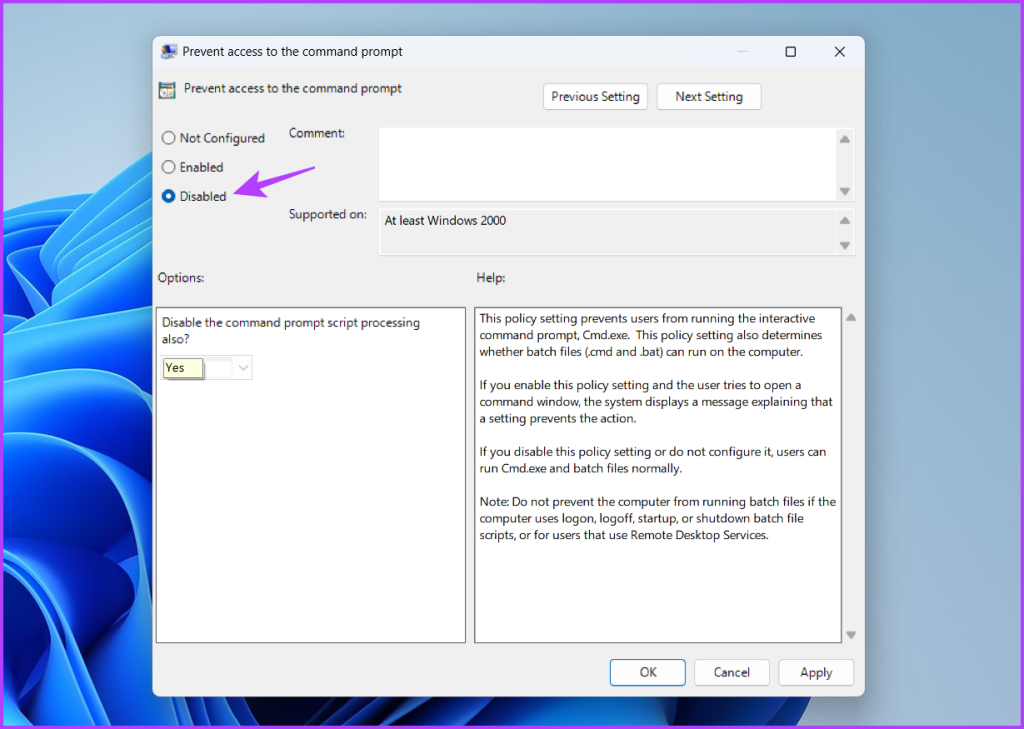
To enable Command Prompt, choose the Disabled or Not configured option. Then, click Apply and OK to save the changes.
How to Disable Windows PowerShell
Just like Command Prompt, there are two tools available to disable Windows PowerShell: one is the Local Security Policy, and the other is the Local Group Policy Editor. Continue reading to know how to use these tools to disable PowerShell.
1. Using Local Security Policy
The Local Security Policy is a built-in Windows tool that lets you make security changes to your computer. You can also use this tool to turn off Windows PowerShell. Here’s how:
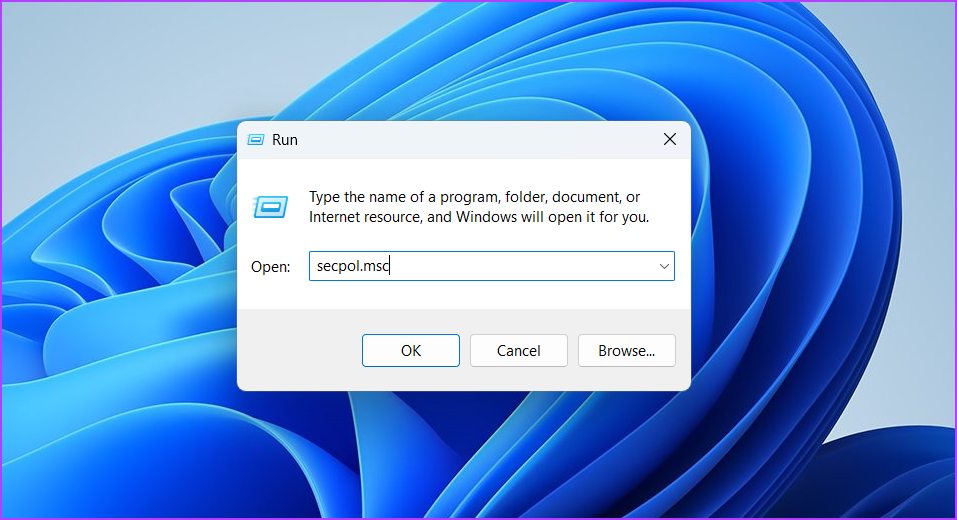
Step 1: Open the Run tool, type secpol.msc in the search bar, and click OK.
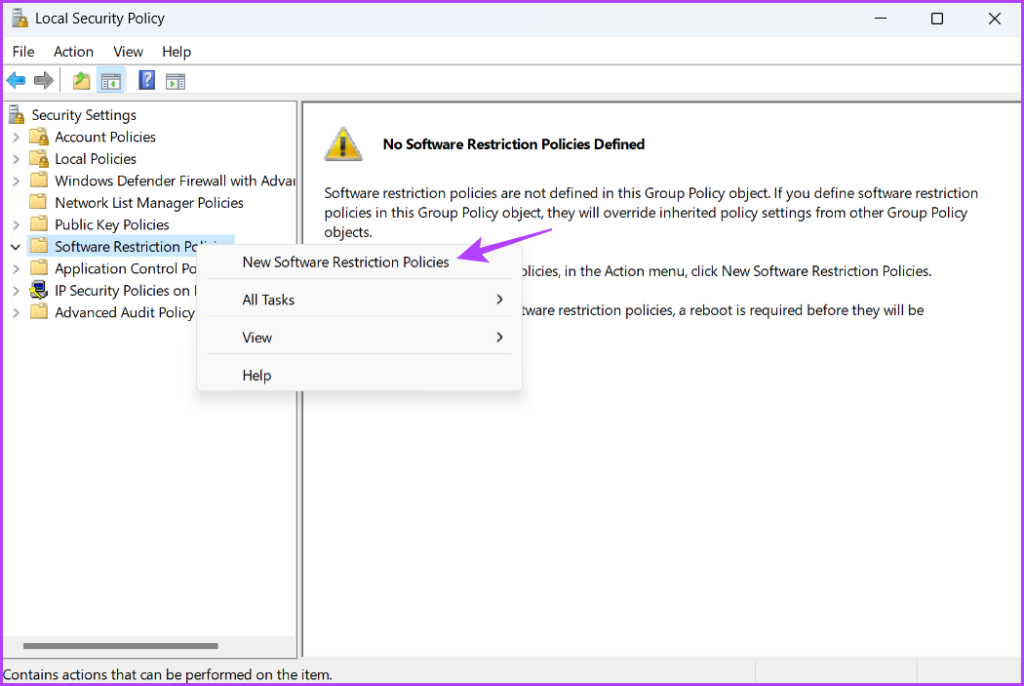
Step 2: Right-click ‘Software Restrictions Policies’ in the left sidebar and then choose ‘New Software Restriction Policies’ from the context menu.
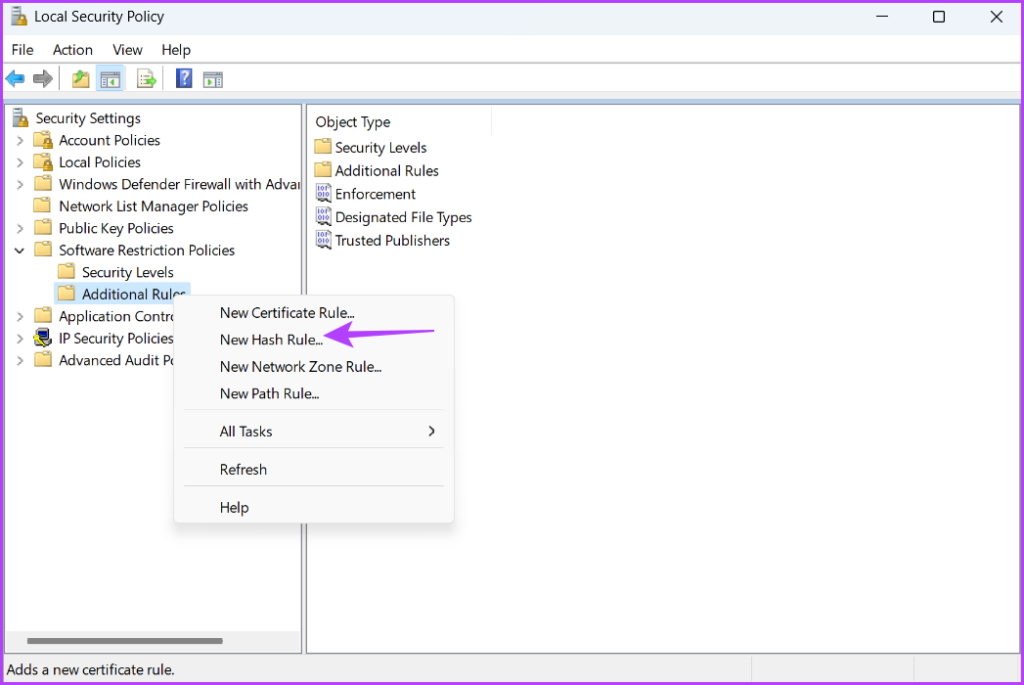
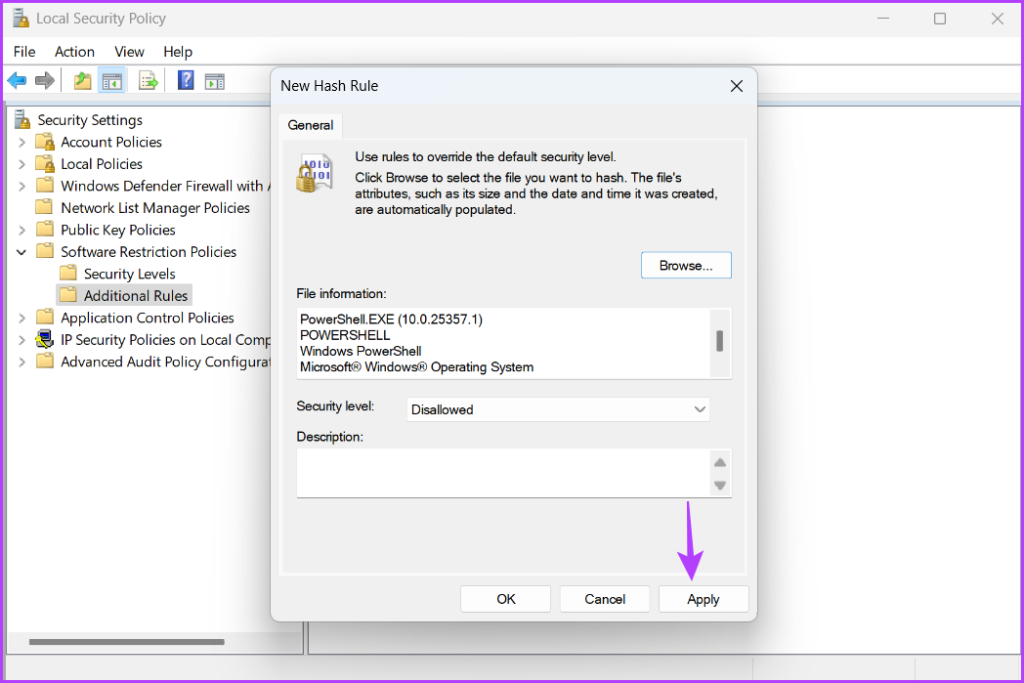
Step 3: Right-click on Additional Rules and choose ‘New Hash Rule’.
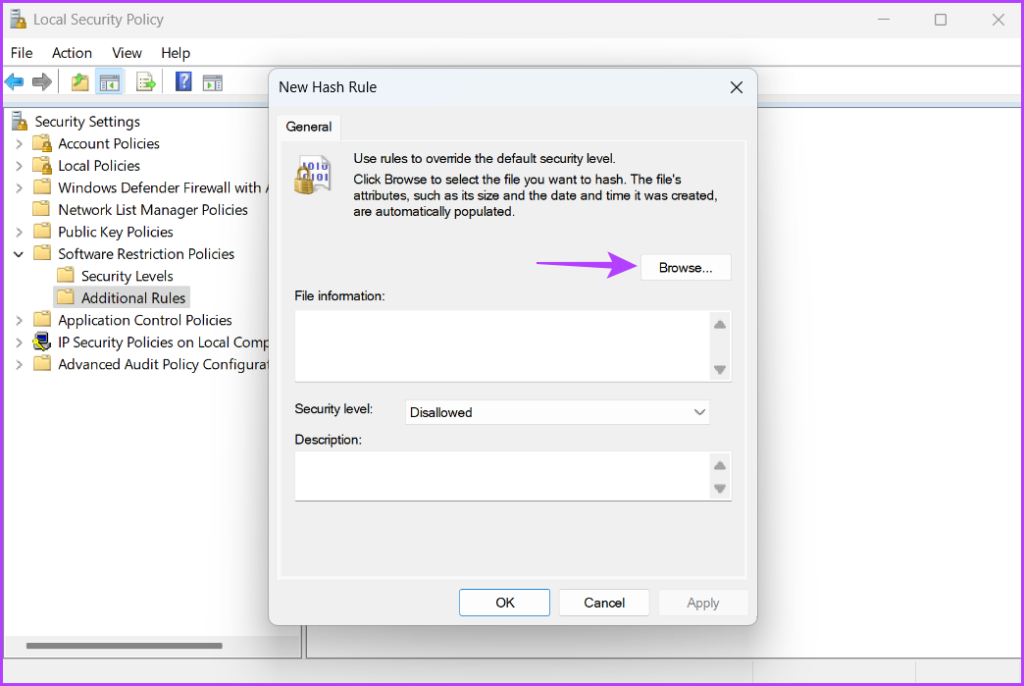
Step 4: Click the Browse button.
Step 5: Paste the following address in the address bar and press Enter:
%SystemRoot%\SysWOW64\WindowsPowerShell\v1.0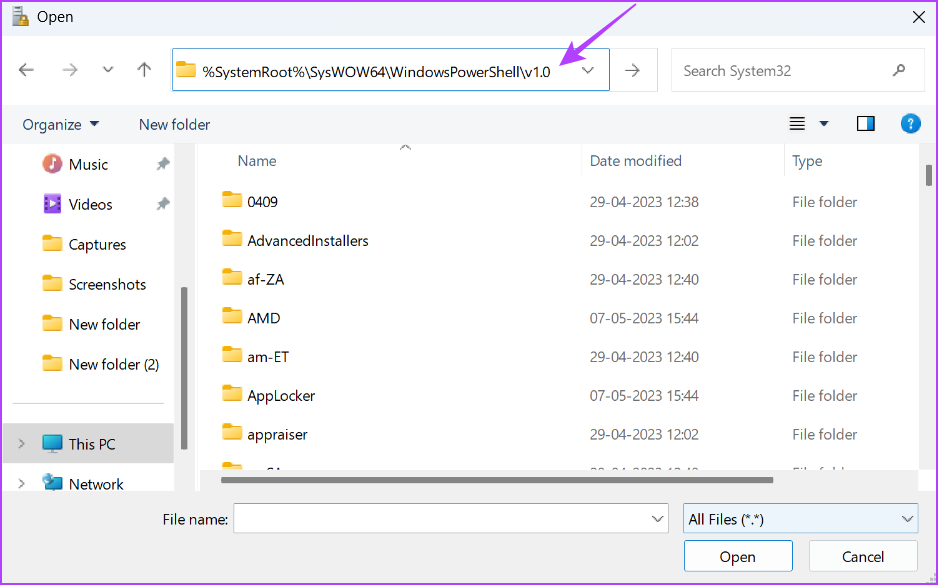
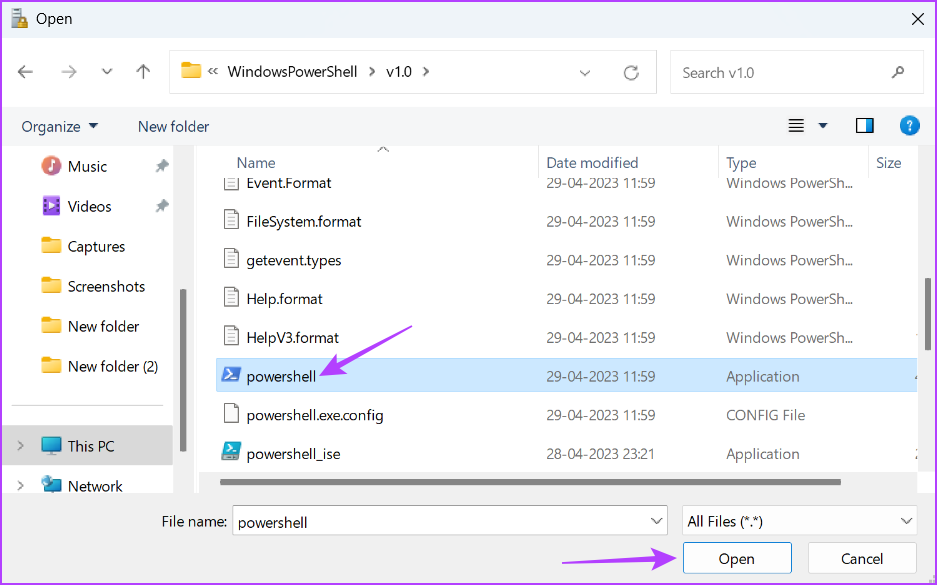
Step 6: Select the PowerShell.exe file and then click the Open button.
Step 7: Click Apply and then OK to save the changes.
2. Using the Local Group Policy Editor
The Local Group Policy Editor contains a Windows PowerShell policy that you configure to prevent the access of PowerShell to non admins. Follow these steps to configure this policy:
Step 1: Launch the Run tool, type gpedit.msc, and then click OK.
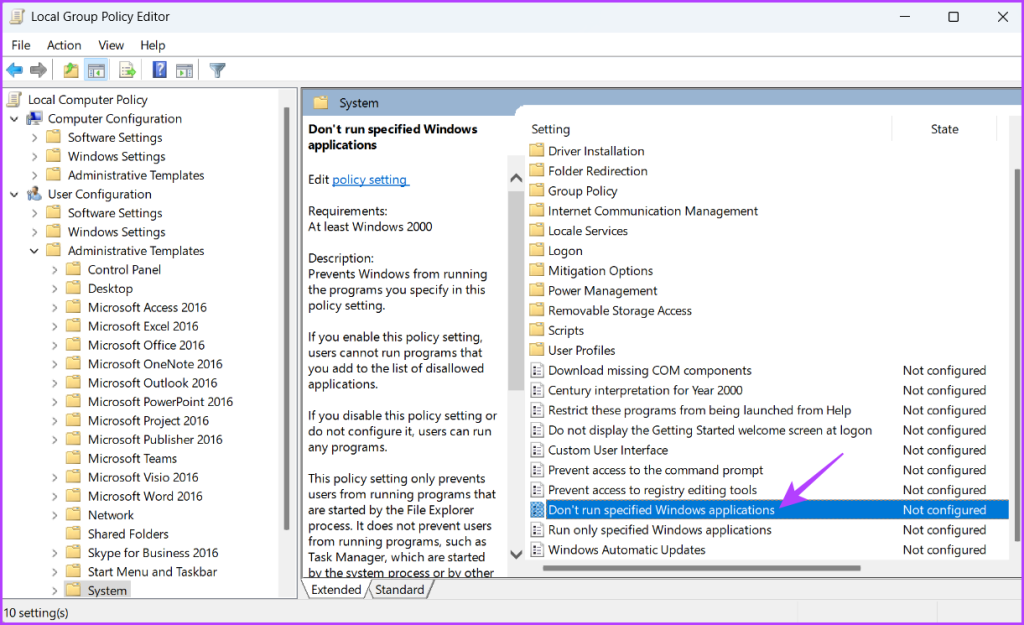
Step 2: Navigate to the following location:
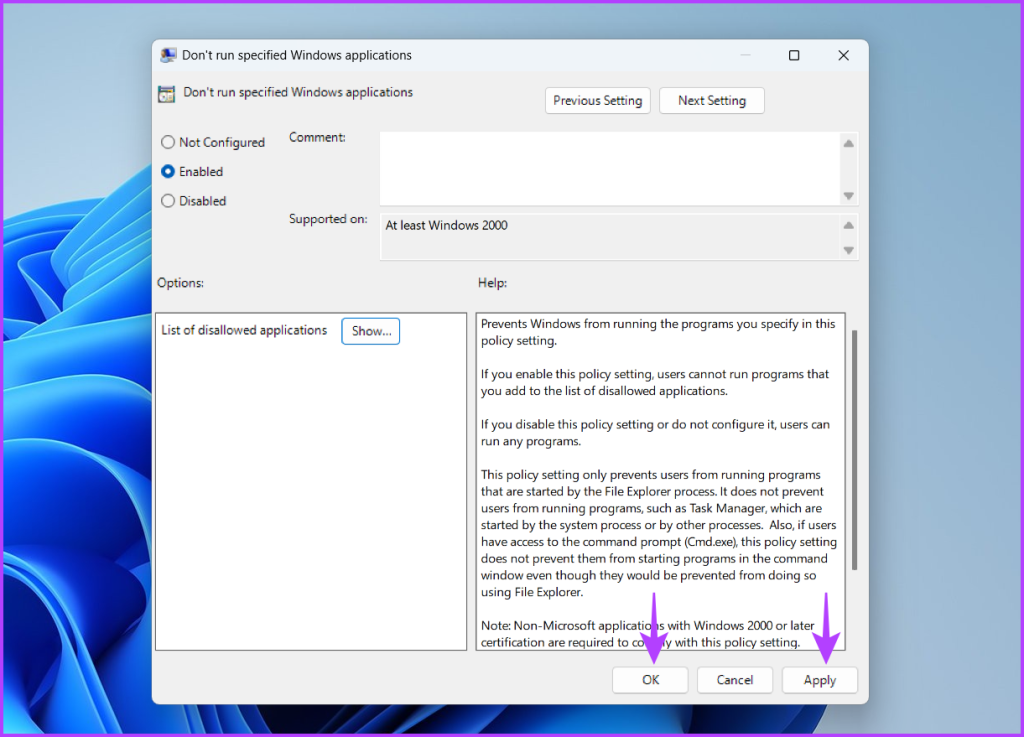
User Configuration\ Administrative Templates\ SystemStep 3: Double-click on the ‘Don’t run specified Windows applications’ policy.
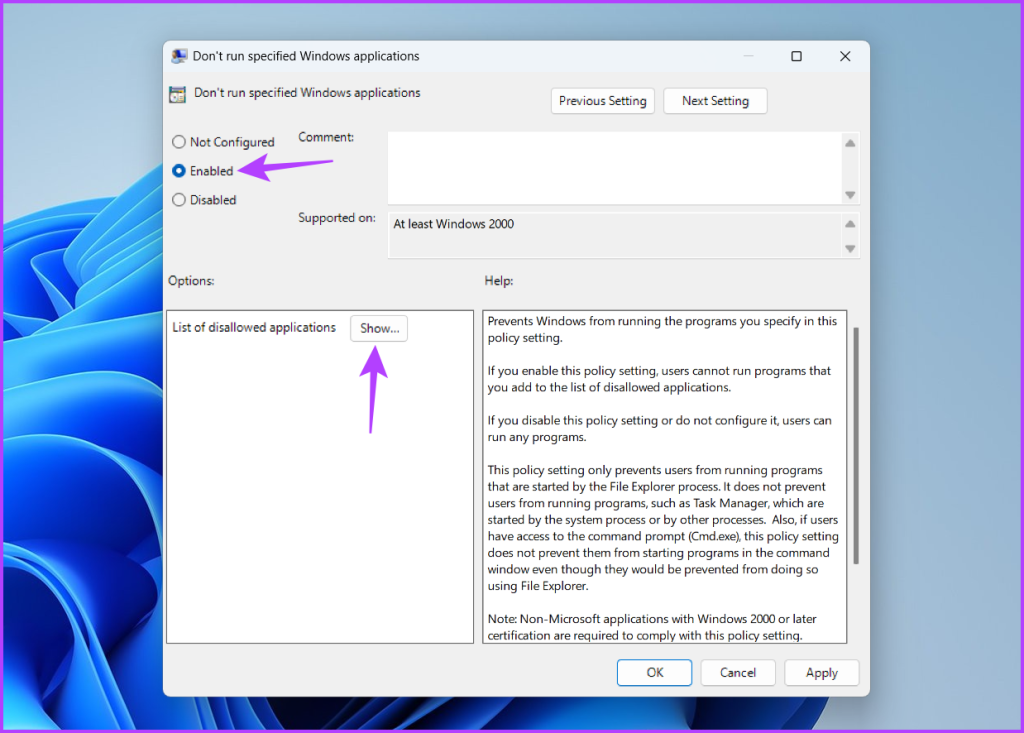
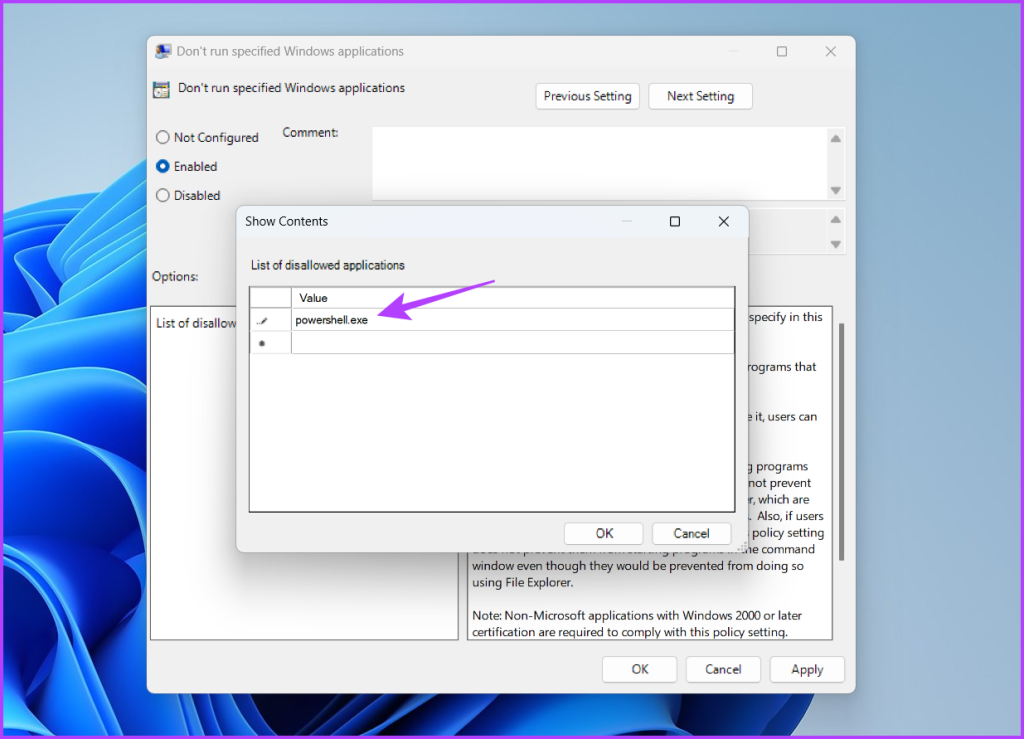
Step 4: Choose the Enabled option and then click the Show button.
Step 5: Type powershell.exe in the New shell and then click OK.
Step 6: Click Apply and then OK to save the changes.
Safeguard Your Computer
If you share your computer with someone else, it’s important to disable Command Prompt and Windows PowerShell when not in use. You can disable these tools using the above methods. Let us know in the comments which of the above methods is the easiest.
Last updated on 05 June, 2023
The above article may contain affiliate links which help support Guiding Tech. However, it does not affect our editorial integrity. The content remains unbiased and authentic.
Read Next
 GT Explains: Difference Between Command Prompt and Powershell
Windows OS ships with several apps and utility tools to help users complete different tasks.
GT Explains: Difference Between Command Prompt and Powershell
Windows OS ships with several apps and utility tools to help users complete different tasks.
 Top 7 Ways to Fix Command Prompt Not Working on Windows 11
Command Prompt is a powerful utility on Windows and is often underutilized.
Top 7 Ways to Fix Command Prompt Not Working on Windows 11
Command Prompt is a powerful utility on Windows and is often underutilized.
 7 Ways to Open Command Prompt on Windows 11, 10, and earlier
If you’re a Windows user, you might have come across Command Prompt, one of the Windows' Command Line utilities.
7 Ways to Open Command Prompt on Windows 11, 10, and earlier
If you’re a Windows user, you might have come across Command Prompt, one of the Windows' Command Line utilities.
 Top 6 Ways to Fix Command Prompt Keeps Popping Up in Windows 11
It's natural to feel clueless when Command Prompt keeps popping up on your Windows 11 PC for no apparent reason.
Top 6 Ways to Fix Command Prompt Keeps Popping Up in Windows 11
It's natural to feel clueless when Command Prompt keeps popping up on your Windows 11 PC for no apparent reason.
 How to Customize Command Prompt, Adjust Its Window Size on Windows 7
The Windows command prompt isn’t something an average user uses often these days.
How to Customize Command Prompt, Adjust Its Window Size on Windows 7
The Windows command prompt isn’t something an average user uses often these days.
 Start Command Prompt As Admin from Windows Task Manager
The simplest and quickest way to open the Command Prompt is to key in cmd in Windows Search and hit Enter.
Start Command Prompt As Admin from Windows Task Manager
The simplest and quickest way to open the Command Prompt is to key in cmd in Windows Search and hit Enter.
 How to Get Command Prompt in Context Menu in Windows 10 Creators Update
Since the launch of the Windows 10 Creators update, we have seen a lot of new features like Dynamic Lock, Quick Assist, New Windows Defender, etc.
How to Get Command Prompt in Context Menu in Windows 10 Creators Update
Since the launch of the Windows 10 Creators update, we have seen a lot of new features like Dynamic Lock, Quick Assist, New Windows Defender, etc.
 How to Fix Command Prompt Not Working in Windows 10 Error
In the early days of computing, Command Prompt reigned the operating systems before the elegant graphic user interfaces became the primary mode of interaction with the computers.
How to Fix Command Prompt Not Working in Windows 10 Error
In the early days of computing, Command Prompt reigned the operating systems before the elegant graphic user interfaces became the primary mode of interaction with the computers.
DID YOU KNOW
PayPal was voted as one of the top 10 worst business ideas in 1999.

