A network adapter is a vital component that connects your computer to the internet. Understanding the performance of your network adapter can help in resolving connection issues or optimizing your network connection.

Whether you want to optimize or want to know about your network capabilities, you’ve landed on the right page. This post shares quick ways to check network adapter speed on Windows 11.
1. Check Network Adapter Speed Using the Settings App
The quickest way to check the network adapter speed on Windows 11 is through the Windows Settings app. The great news is that, besides displaying the network adapter speed, the Settings app also provides information about other connection aspects, such as the network band, MAC address, and more. So, here’s how to check the network adapter connection speed using the Settings app.
Step 1: Press the Windows + I key to open the Settings app.
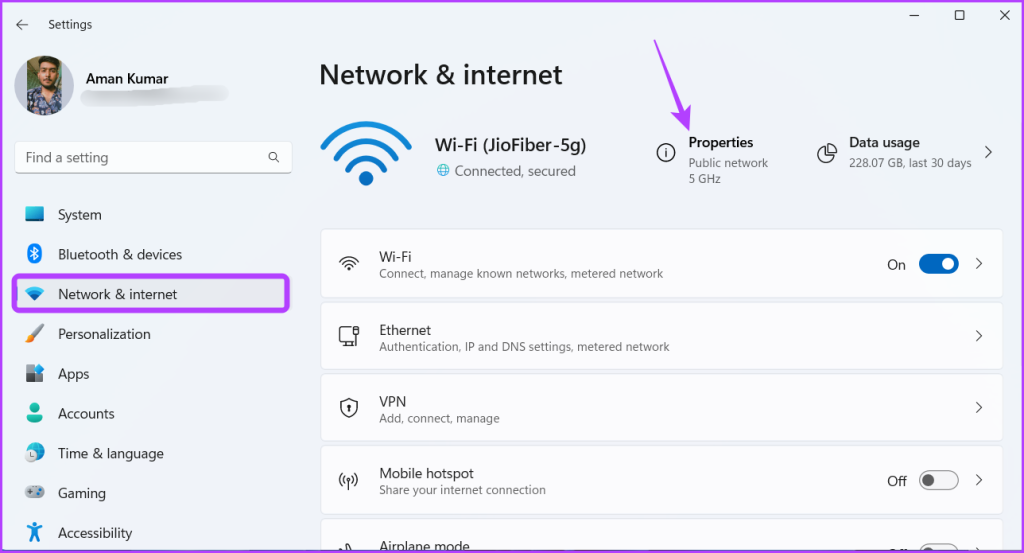
Step 2: Choose the Network & internet option from the left sidebar and then click Properties in the right pane.
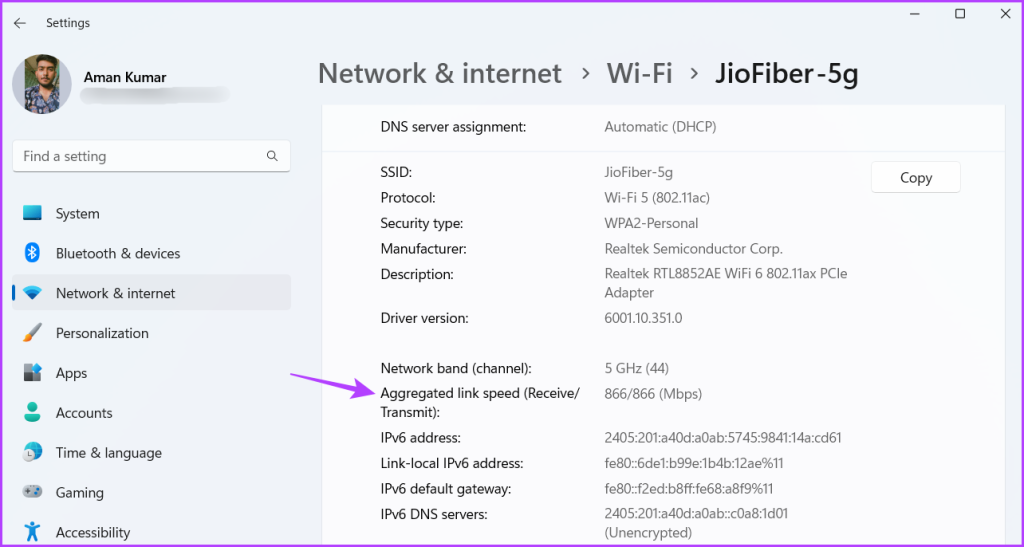
Step 3: You can see the network speed next to the ‘Aggregated link speed (Receive/ Transmit)’ option.
2. Check Network Adapter Speed Using the Control Panel
The Control Panel is the central hub of a Windows computer offering a wide range of functionalities. From simple customizations, such as personalizing your system, to more complex operations, like creating new user accounts, you can do it all using the Windows Control Panel.
You can also use the Control Panel to check Ethernet or Wi-Fi speed that your motherboard supports. Here’s how to do that:
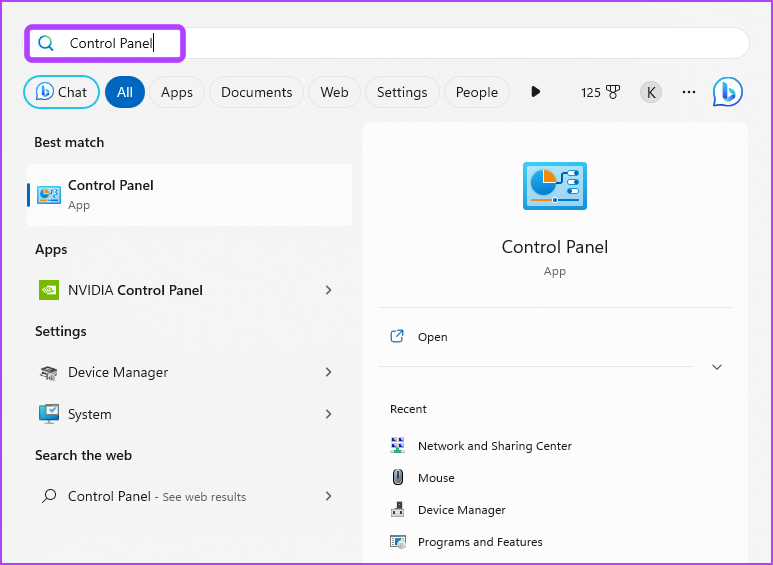
Step 1: Press the Windows key to open the Start Menu.
Step 2: In the Start Menu search bar, type Control Panel and press Enter.
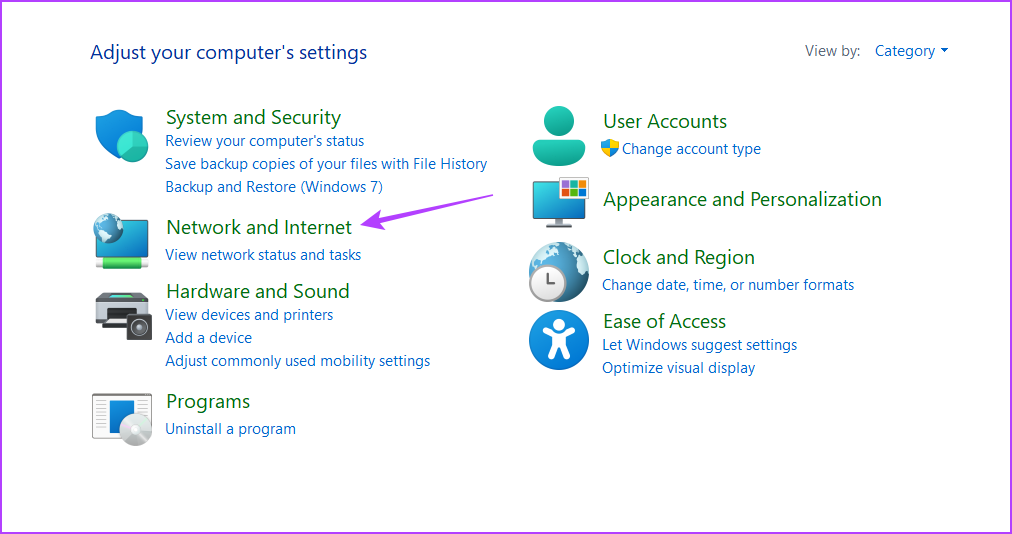
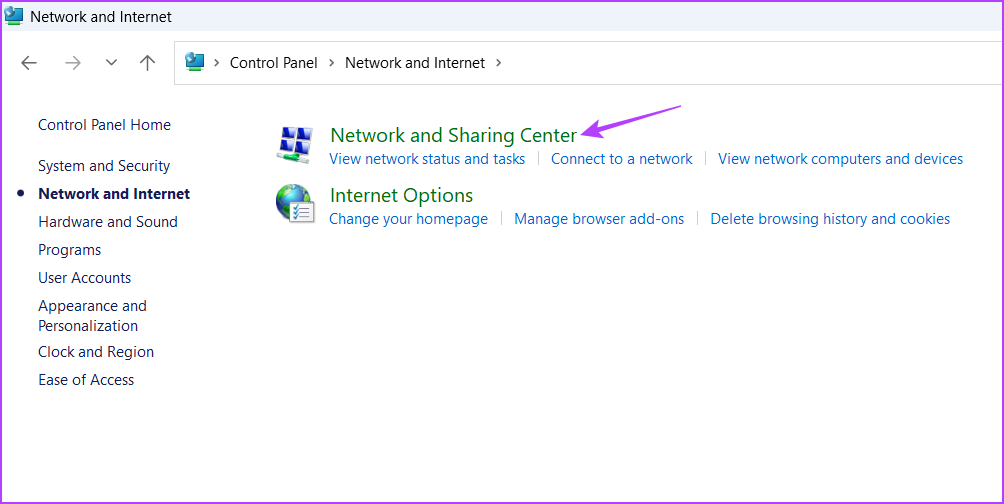
Step 3: Click on the ‘Network and Internet’ option.
Step 4: Choose the ‘Network and Sharing Center’ option.
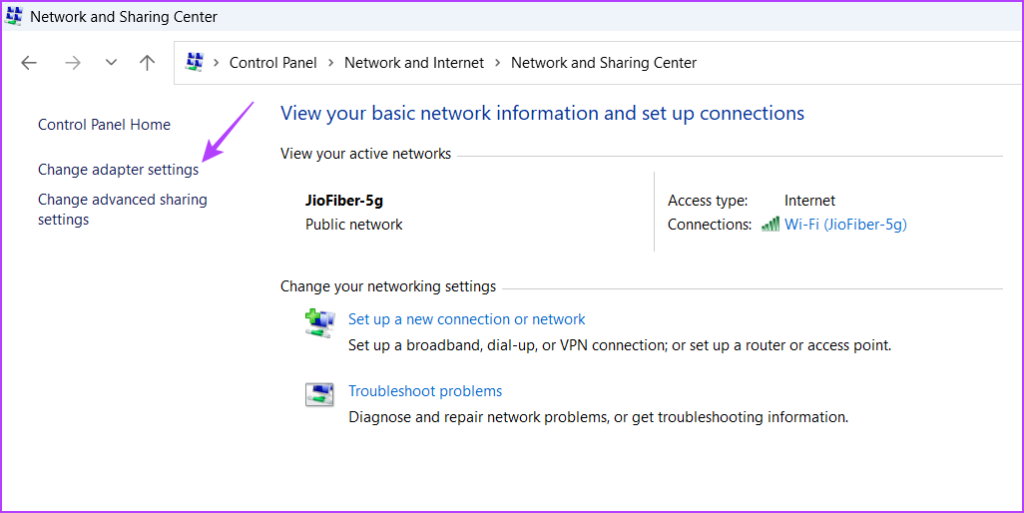
Step 5: Click the ‘Change adapter settings’ in the left sidebar.
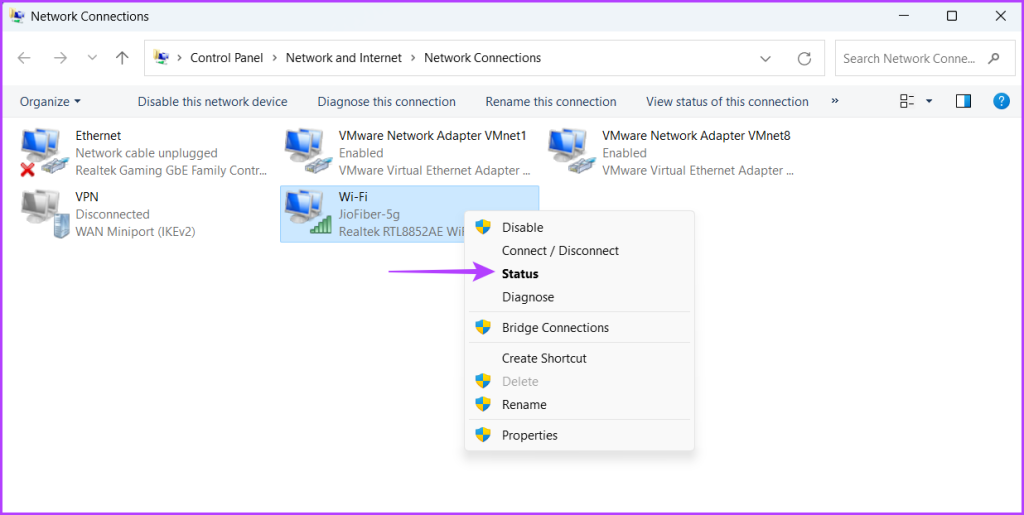
Step 6: Right-click on your Ethernet or Wi-Fi connection and then choose Status from the context menu.
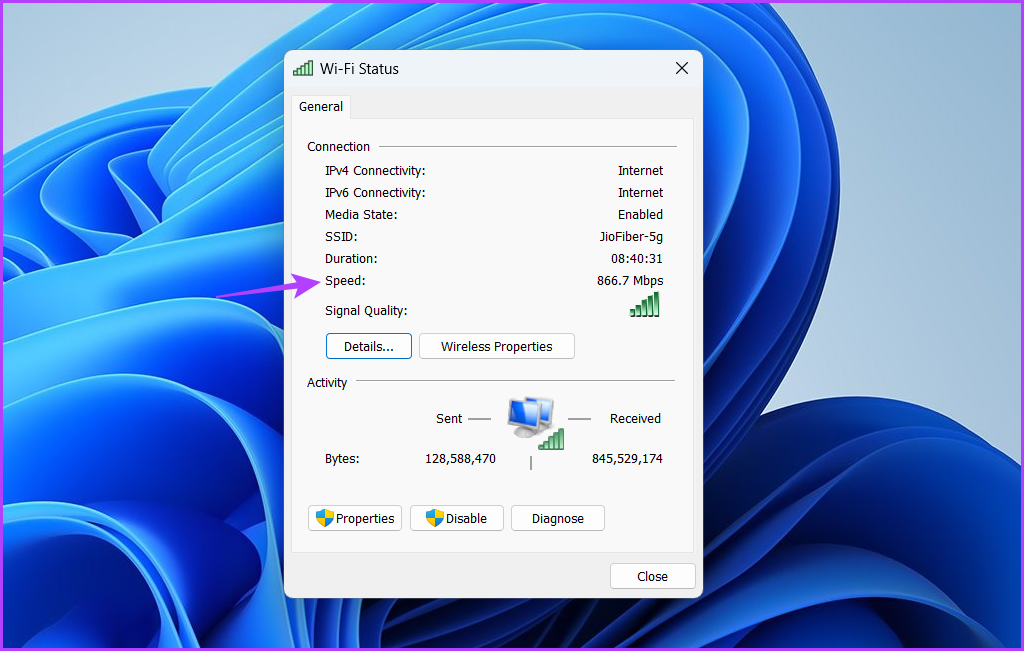
You can check your network adapter speed next to the Speed field.
3. Check Network Adapter Speed Using the Command-Line Tools
If you’re an experienced Windows user who prefers working with command-line tools, you use them to check the network adapter speed on Windows 11. To check the speed of your Ethernet or Wi-Fi interface using Command Prompt, follow these instructions:
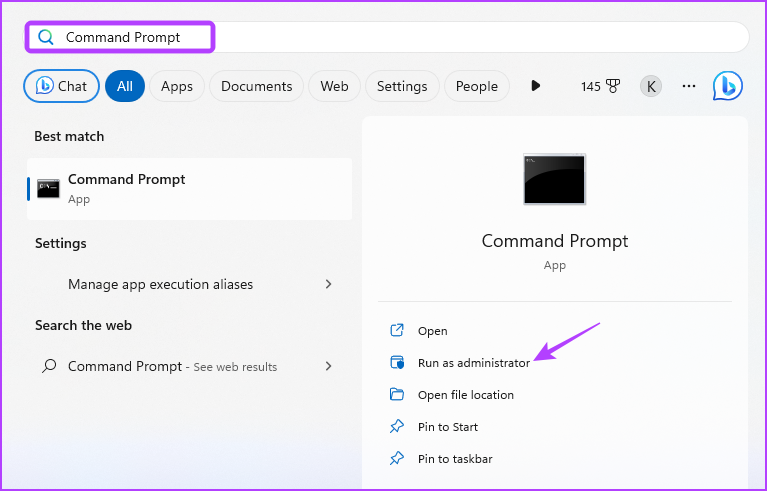
Step 1: Open the Start Menu, type Command Prompt in the search bar and then click the Run as administrator option in the right pane.
Step 2: In the elevated Command Prompt window, type the following command and press Enter.
netsh wlan show interfaces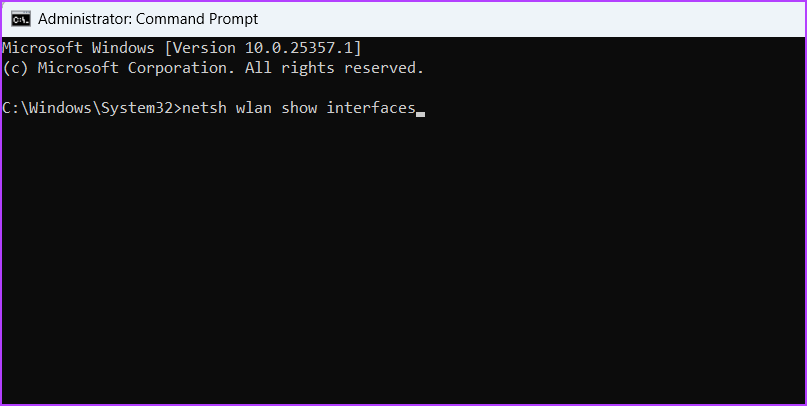
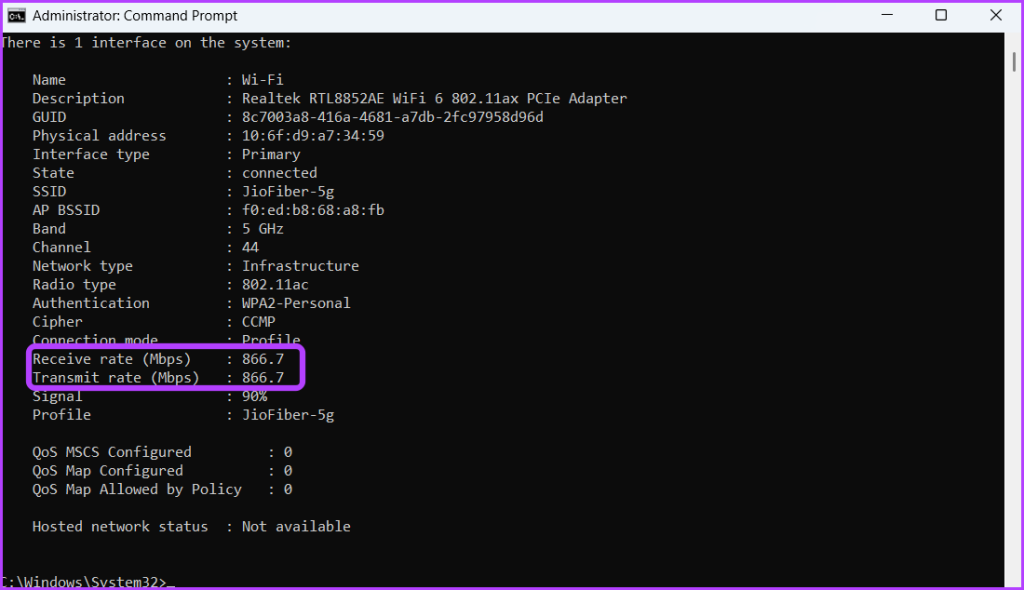
Step 3: Check the Receive rate (Mbps) and Transmit rate (Mbps) fields to know the connection speed of your network adapter.
Like Command Prompt, you can use Windows PowerShell to get information about your network adapter speed. Here’s how:
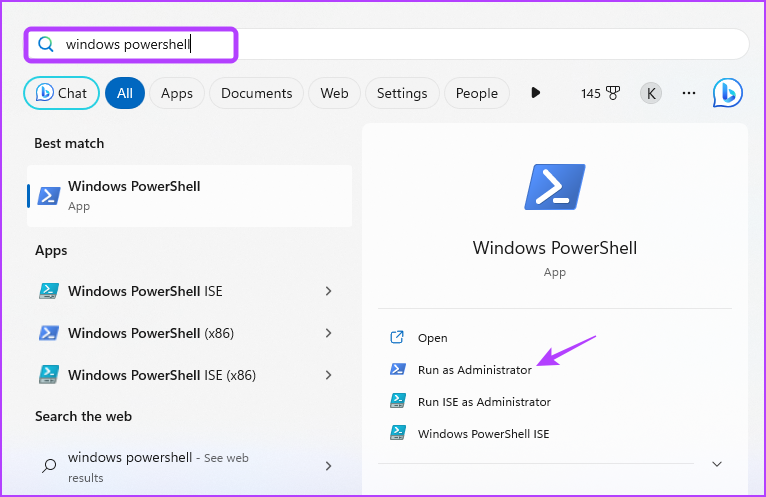
Step 1: Launch the Start Menu, type Windows PowerShell in the search bar and then choose the Run as administrator option from the right pane.
Step 2: In the elevated PowerShell window, type the following command and press Enter.
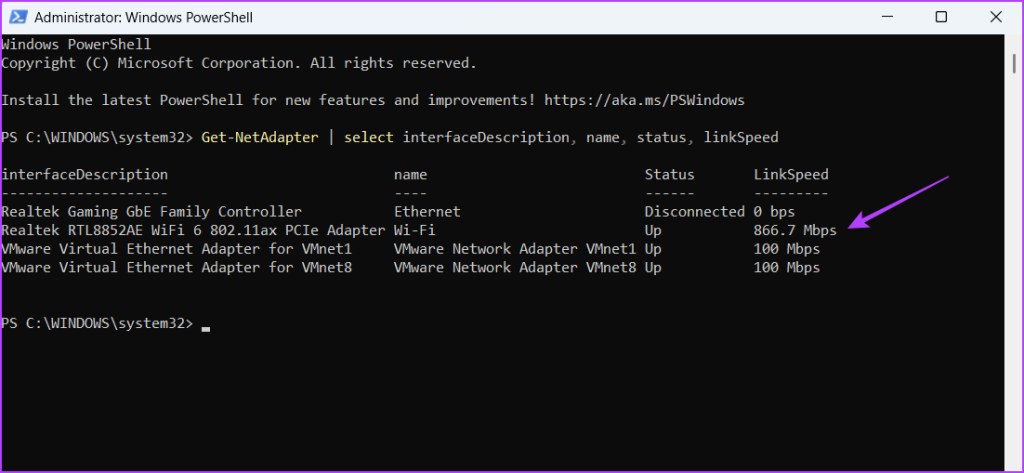
Get-NetAdapter | select interfaceDescription, name, status, linkSpeed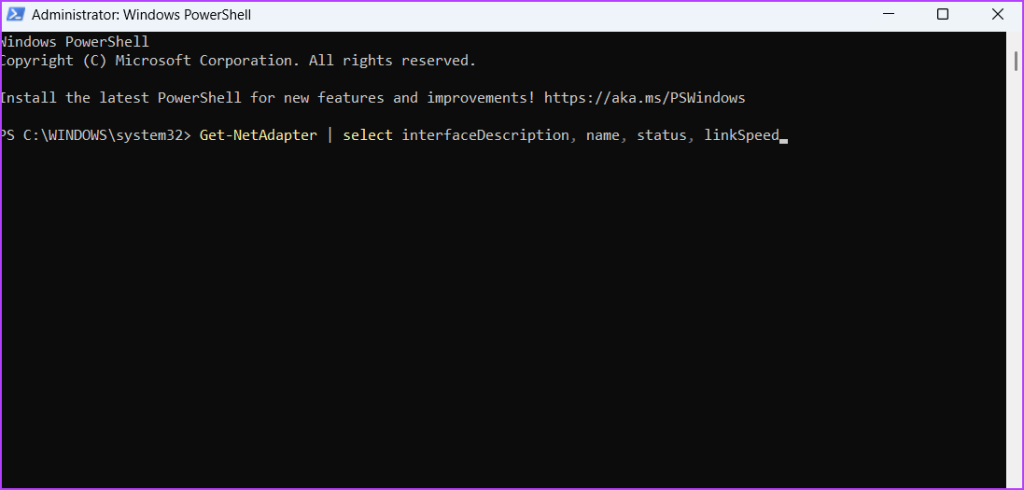
After the command is executed, you’ll see both Ethernet and Wi-Fi adapter of your computer. Check the connection speed of your network adapter in the LinkSpeed column.
FAQs
There can be several reasons why your network adapter speed is slow, but network congestion often emerges as the primary culprit. This occurs when multiple devices are simultaneously using the same network. Also, outdated network drivers, software conflicts, hardware issues, and background processes or malware can also contribute to slowing down your network adapter.
It’s very easy to reset your network adapter using Command Prompt. Simply, press the Windows + S keyboard shortcut to open the Start menu, type command prompt and choose Run as administrator from the right pane. Then, in the elevated Command Prompt window, type netsh winsock reset and press Enter to reset your network adapter.
Know Your Computer Better
You might visit a third-party website to check our connection speed. But have you ever wondered what maximum speed your network adapter supports? If you wish to check the network adapter speed on Windows 11, you can do that using the above methods.
Last updated on 06 June, 2023
The above article may contain affiliate links which help support Guiding Tech. However, it does not affect our editorial integrity. The content remains unbiased and authentic.
Read Next
 Top 13 Ways to Fix Windows 10 Network Adapter Missing Issue
Nobody appreciates it when the internet stops working out of the blue on their PC.
Top 13 Ways to Fix Windows 10 Network Adapter Missing Issue
Nobody appreciates it when the internet stops working out of the blue on their PC.
 Top 6 Ways to Fix Windows Could Not Find a Driver for Your Network Adapter Error
Windows 11 includes a network adapter troubleshooter that can help diagnose and resolve common network connectivity issues.
Top 6 Ways to Fix Windows Could Not Find a Driver for Your Network Adapter Error
Windows 11 includes a network adapter troubleshooter that can help diagnose and resolve common network connectivity issues.
 5 Best Ways to Check RAM Speed on Windows 11
Getting better RAM or memory can improve your experience on a computer.
5 Best Ways to Check RAM Speed on Windows 11
Getting better RAM or memory can improve your experience on a computer.
 Review of Speed Test for iPhone: Download, Upload Speed Test
Sometimes, some of the best and most useful apps are the ones that we take for granted but that are so essential that we use them everyday.For me, this is
Review of Speed Test for iPhone: Download, Upload Speed Test
Sometimes, some of the best and most useful apps are the ones that we take for granted but that are so essential that we use them everyday.For me, this is
 Top 10 Ways to Fix Windows 10 Display Adapter Code 43 Error
Windows 10's Code 43 error is mostly associated with the graphics card or display adapter on your PC.
Top 10 Ways to Fix Windows 10 Display Adapter Code 43 Error
Windows 10's Code 43 error is mostly associated with the graphics card or display adapter on your PC.
 Check If You Are Getting Right Internet Speed with NetSpeedMonitor
I am writing this article sitting at a café and working on a Wi-Fi connection.
Check If You Are Getting Right Internet Speed with NetSpeedMonitor
I am writing this article sitting at a café and working on a Wi-Fi connection.
 Use Windows Network Diagnostics to Repair Network Issues in Windows 7
One morning you are working flawlessly on your computer with all the network connectivity working seamlessly, and the next morning all of a sudden you notice a yellow exclamation mark
Use Windows Network Diagnostics to Repair Network Issues in Windows 7
One morning you are working flawlessly on your computer with all the network connectivity working seamlessly, and the next morning all of a sudden you notice a yellow exclamation mark
 How to Check Internet Speed on PC and Mobile
At times, when you are downloading a file from the internet, it's takes a lot of time.
How to Check Internet Speed on PC and Mobile
At times, when you are downloading a file from the internet, it's takes a lot of time.
DID YOU KNOW
The Tesla Model S can go from 0 to 60 mph in 1.2 seconds.

