Windows 11 does an excellent job of detecting all kinds of USB storage devices and providing access to their contents. Sometimes, when you connect a USB drive to your PC, Windows may fail to show some or all of your files and folders.
It’s natural to feel clueless when important files and folders suddenly disappear from your flash drive. Instead of immediately formatting your USB drive or utilizing any file recovery tools, consider applying the following tips to fix the issue.
1. Connect the Drive to a Different USB Port
This is an easy way to check if the issue if there is an issue with the USB port you are using. Ejecting the USB drive and reconnecting it will also take care of any minor glitches that may have been preventing Windows from showing files and folders on the drive.

Another thing you can do is plug the USB drive into a different computer. It will to confirm whether there is a problem with the USB drive itself.
2. Configure File Explorer to Show Hidden Items
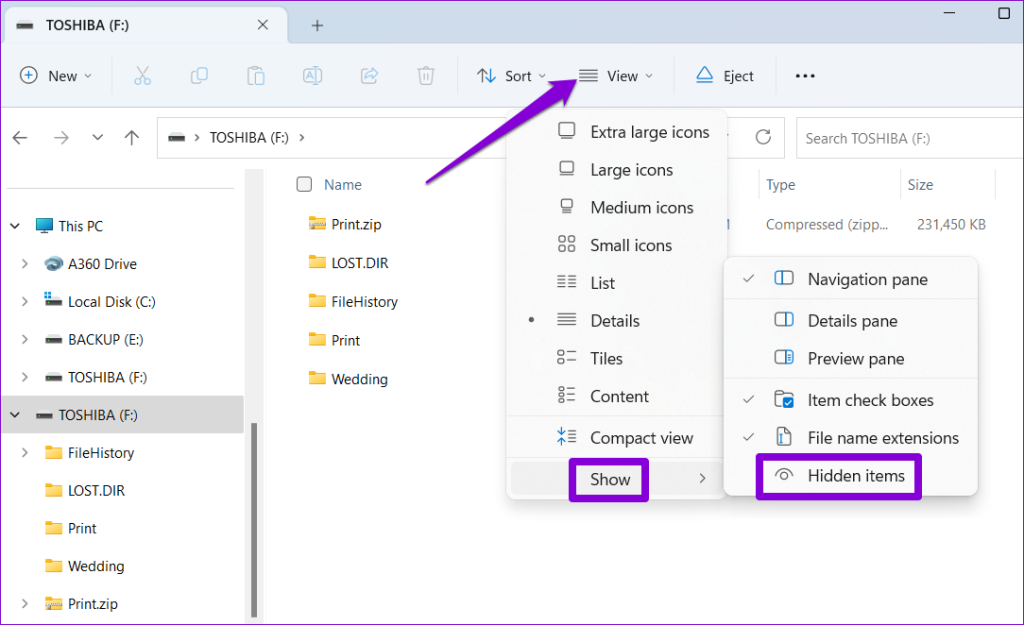
If some of your files and folders are missing from the USB drive, but the storage space is still being used, they are likely hidden. To reveal them, you will need to configure File Explorer to show hidden items on Windows. Here’s how to do it.
Step 1: Press the Windows + E keyboard shortcut to open File Explorer and navigate to your drive.
Step 2: Click the View menu at the top, go to Show, and select the Hidden items option.
3. Search for Your Missing File or Folder
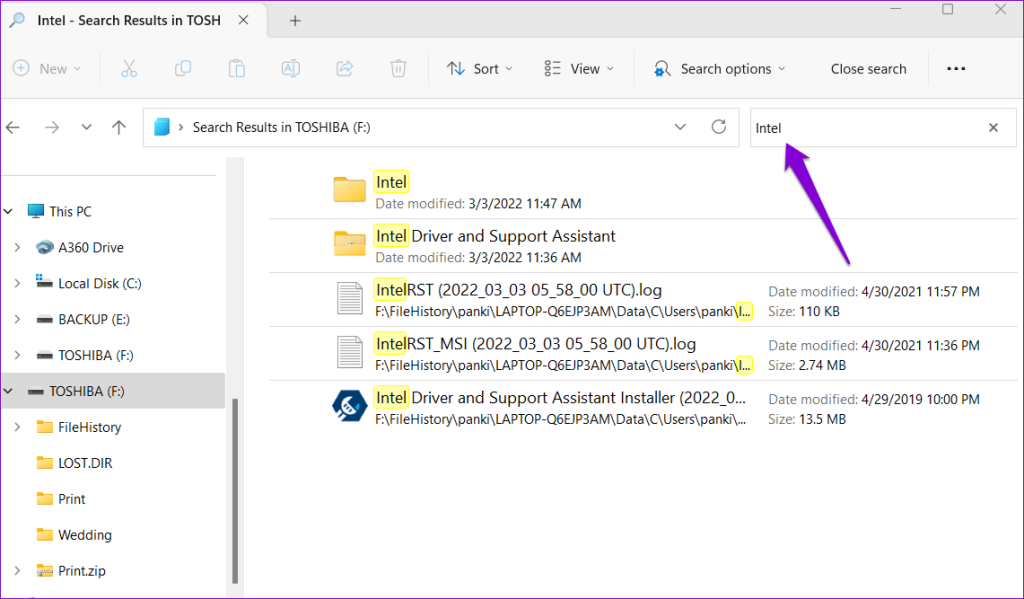
Manually locating a specific file or folder on your USB drive can be challenging if your USB drive contains a lot of files and folders. If that’s the case, then the Files Explorer may be unable to show all those files and folders. You can try using File Explorer’s search bar to locate the missing file or folder and see if it works.
Press the Windows + E keyboard shortcut to open File Explorer and navigate to your drive. Type in the name of the missing file or folder in the search bar and see if it shows up.
4. Run the Check Disk Utility
The CHKDSK (short for Check Disk) is a handy utility on Windows that can automatically detect and fix issues with your storage drives. You can run this tool to resolve any issues with your drive and recover missing files and folders.
Although there are several ways to run the CHKDSK utility on Windows, the easiest one is through File Explorer. Here are the steps for the same.
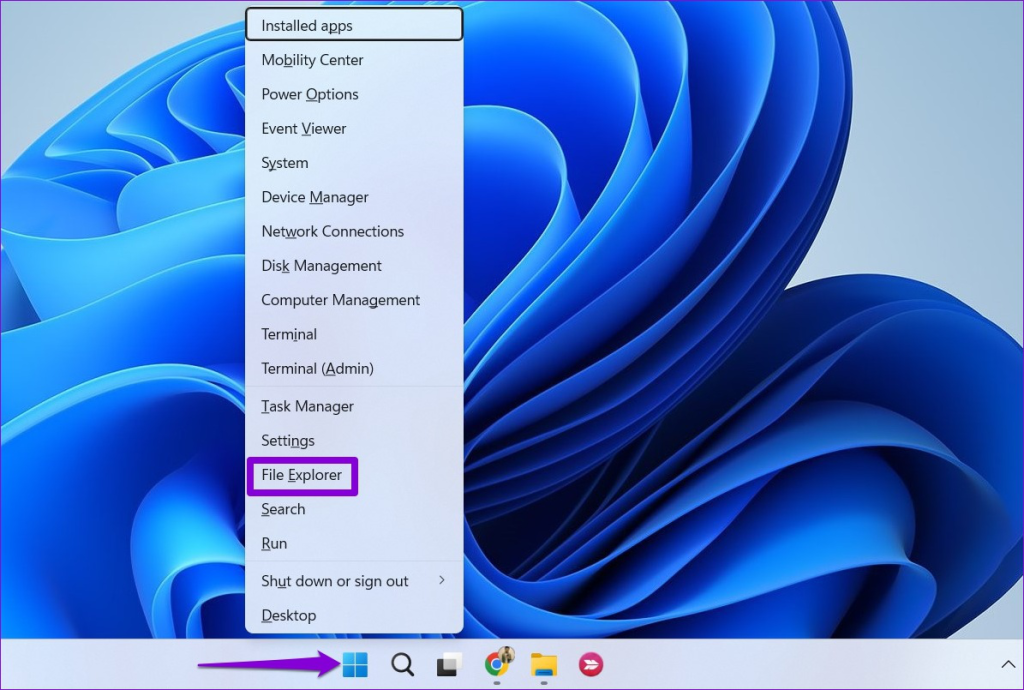
Step 1: Right-click on the Start icon and select File Explorer from the Power User menu.
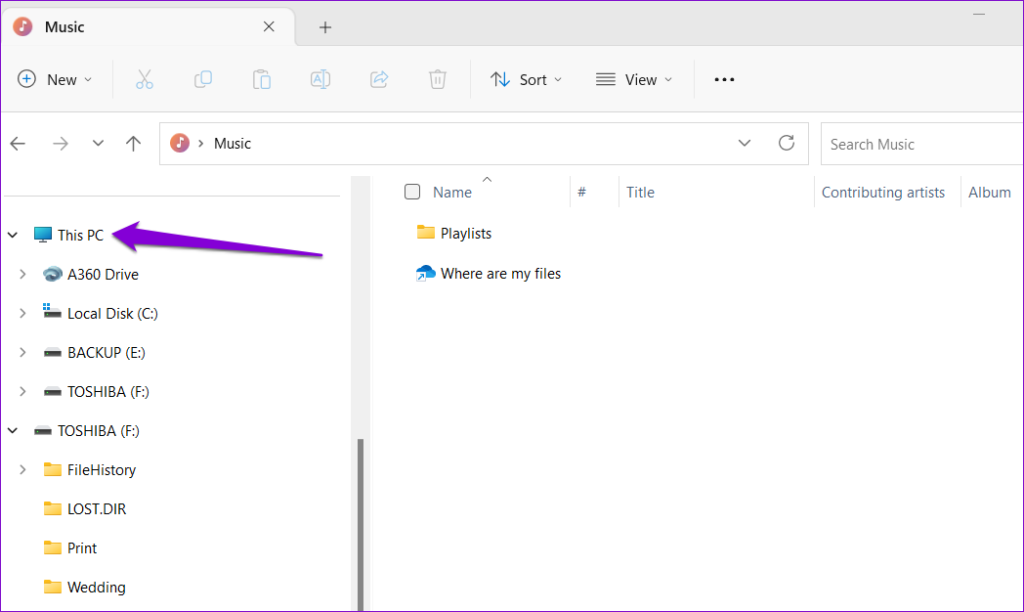
Step 2: Navigate to This PC using the left sidebar.
Step 3: Right-click on your USB drive and select Properties.

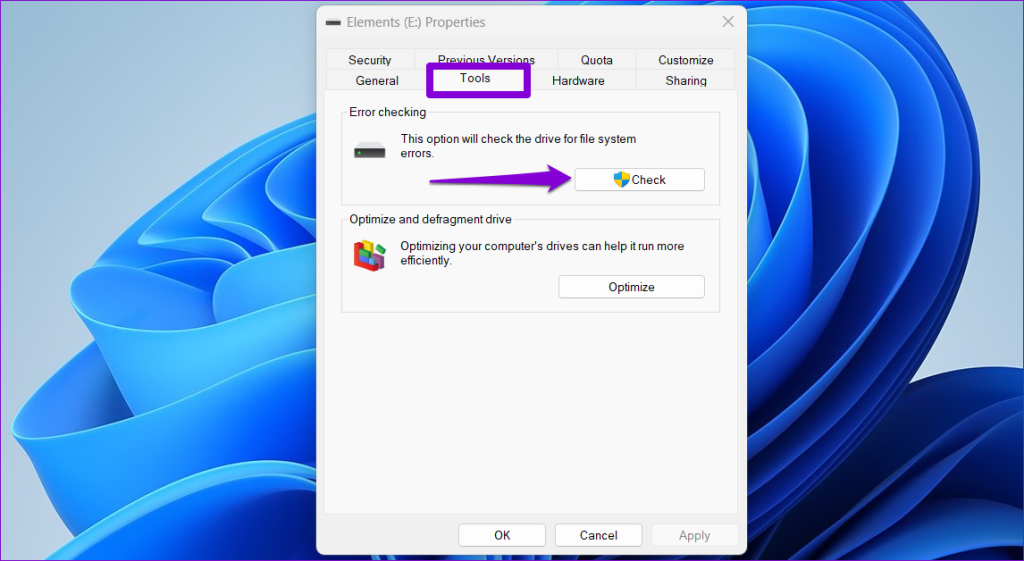
Step 4: Switch to the Tools tab and click the Check button.
Step 5: Select Yes when the User Account Control (UAC) prompt appears.

Step 6: Click Scan drive to initiate the scan.
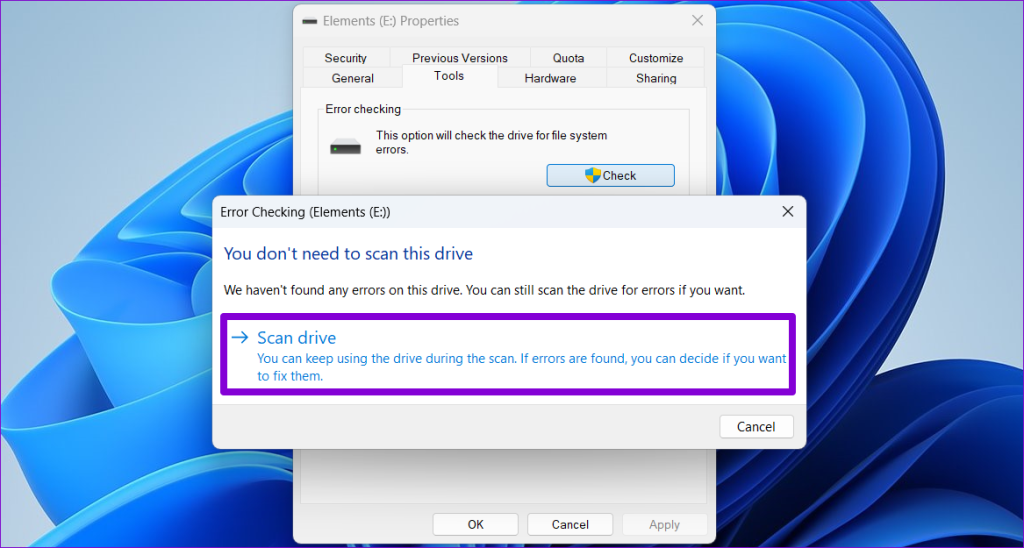
If the Check Disk utility fails to find any issues, continue with the fixes below.
5. Run the Hardware and Devices Troubleshooter
Your Windows 11 PC includes a Hardware and Devices troubleshooter that can resolve common issues with all your external devices, including USB storage drives. Since this troubleshooter is not available in the Settings app, you will need to use the Run dialog box to access it.
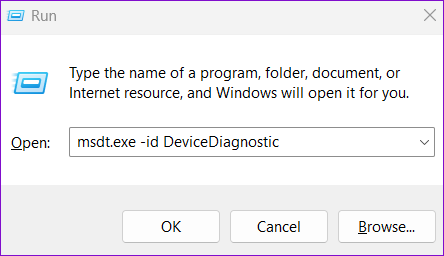
Step 1: Press the Windows + R keyboard shortcut to open the Run dialog. Type msdt.exe -id DeviceDiagnostic in the box and press Enter.
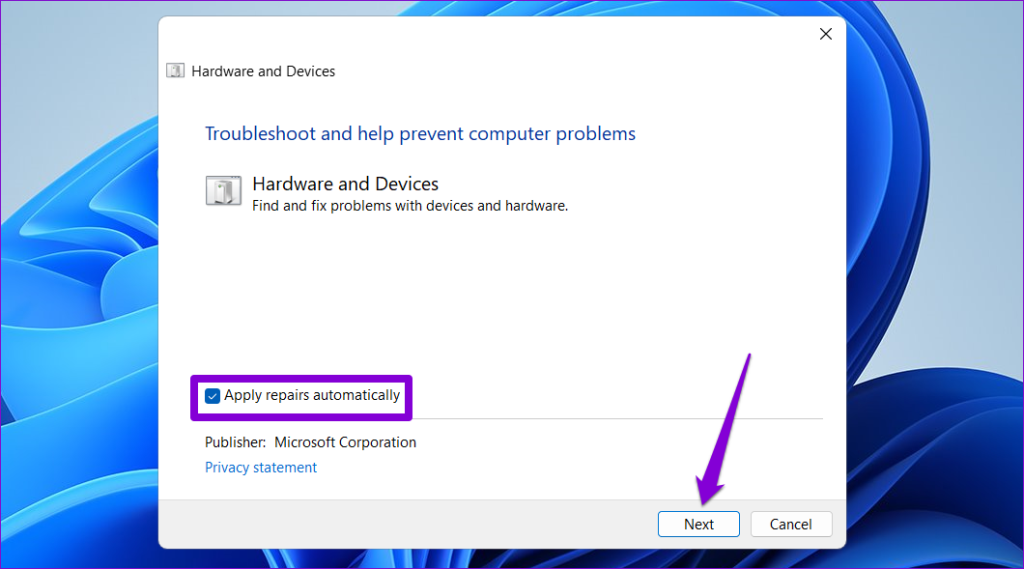
Step 2: In the Hardware and Devices window, click on Advanced.

Step 3: Select the ‘Apply repairs automatically’ checkbox and hit Next.
After running the troubleshooter, check if your USB drive shows missing files and folders.
6. Update or Reinstall USB Drivers
At times, outdated or faulty USB drivers on your PC can interfere with Windows’ ability to show the contents of your USB drive. You can try updating the problematic driver using Device Manager to see if that solves the problem.
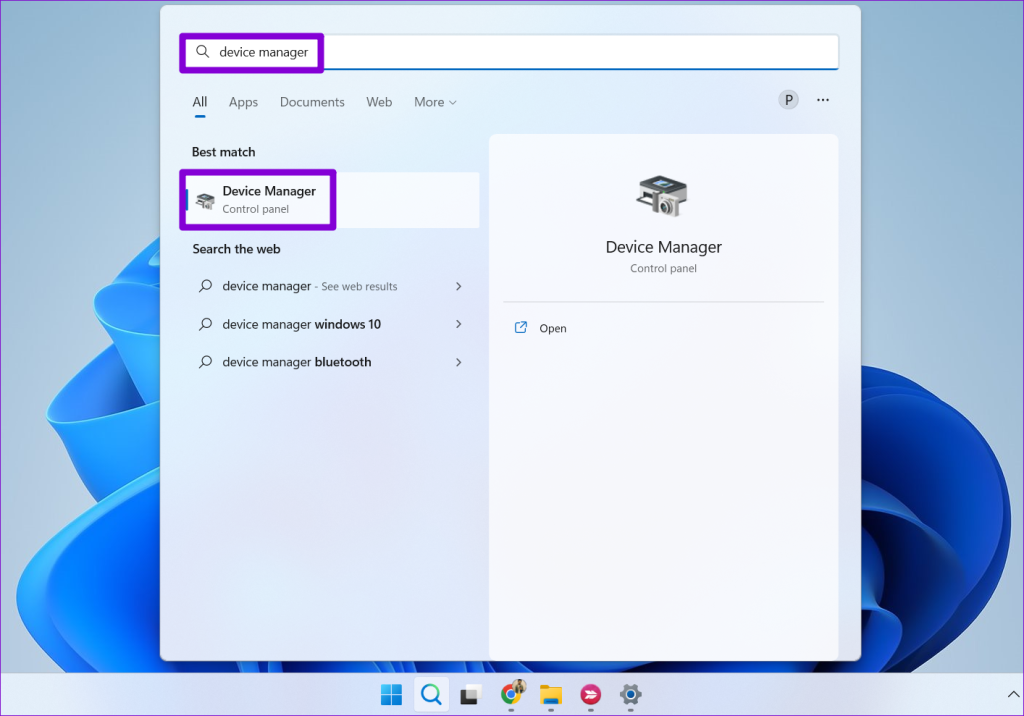
Step 1: Press the Windows + S keyboard shortcut to access the Search menu. Type device manager in the search box and press Enter.
Step 2: Double-click on the ‘Universal Serial Bus controllers’ to expand it.
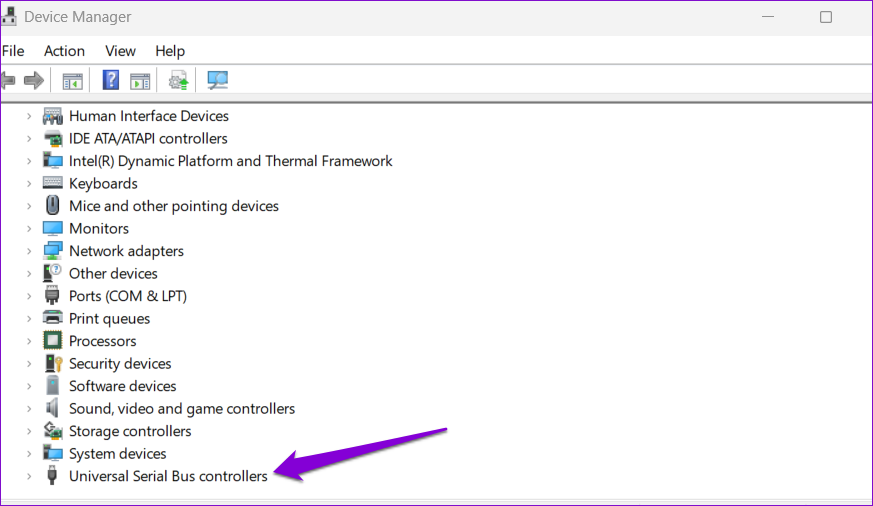
Step 3: Right-click on the relevant USB drive and select Update driver.
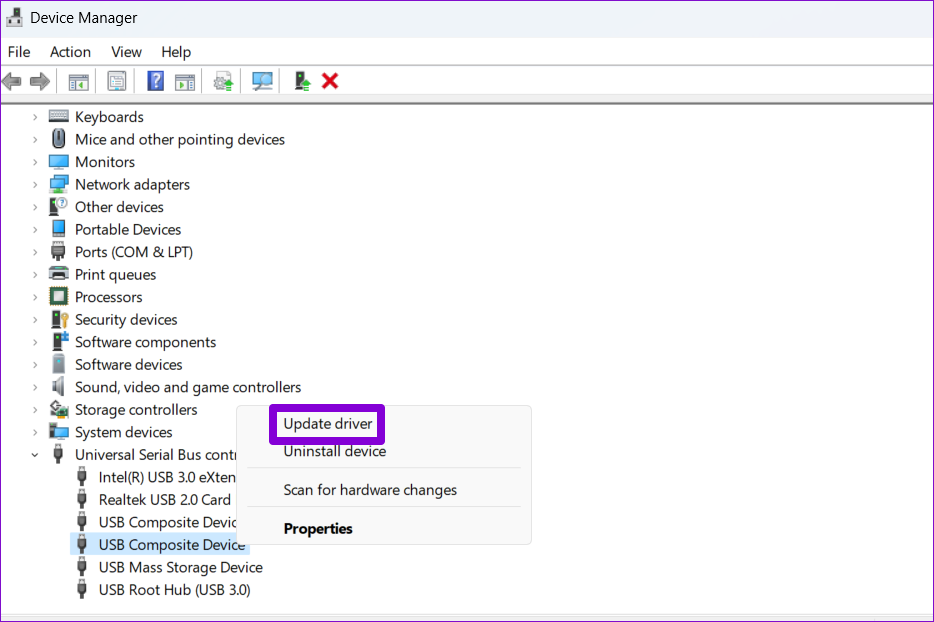
Follow the on-screen prompts to finish updating the driver.
If your hard drive or pen drive is not showing data even after you update the drivers, it’s likely that those drivers are corrupt. In that case, your best option is to uninstall the problematic driver via Device Manager and then restart your PC.
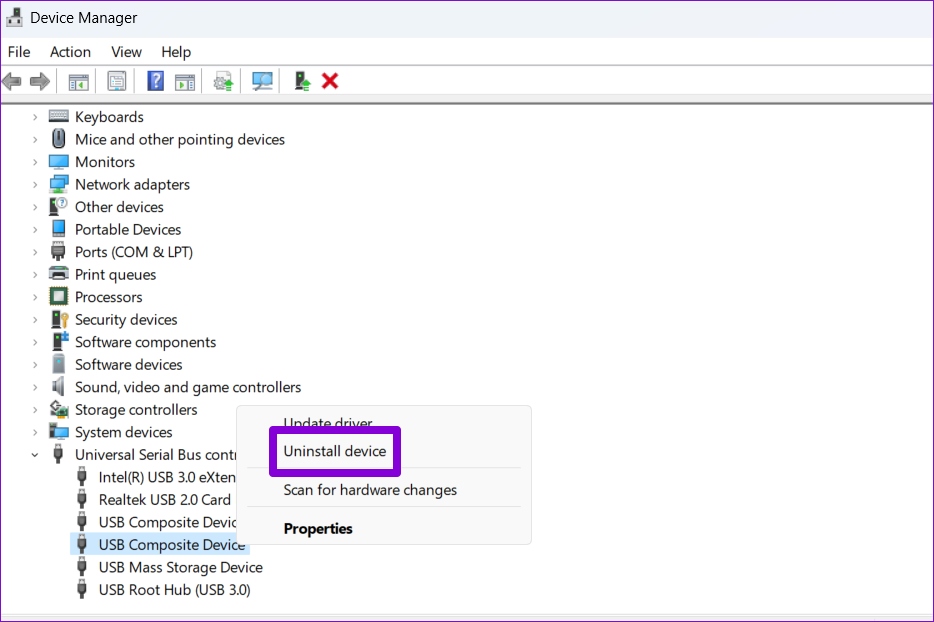
Windows will reinstall the drivers automatically during boot. Following this, your USB drive should display all the files and folders.
Retrieve the Irreplaceable
Removable USB devices like flash drives and external hard drives make it easy to transfer data between computers. But when Windows won’t show the content of your USB drives, it can be difficult to view those important files. Luckily, you can follow the solutions above to fix that.
Last updated on 06 June, 2023
The above article may contain affiliate links which help support Guiding Tech. However, it does not affect our editorial integrity. The content remains unbiased and authentic.
Read Next
 Hide/Unhide Data in Files, Folders, USB Drives With WinMend Folder Hidden
If you have a common computer in your home then I am sure some day or the other you must have thought about hiding some of your files from others.
Hide/Unhide Data in Files, Folders, USB Drives With WinMend Folder Hidden
If you have a common computer in your home then I am sure some day or the other you must have thought about hiding some of your files from others.
 4 Native Ways to Lock Files and Folders on Windows 10
Recently my boss asked me to lend him my external hard disk (for reasons which can’t be explained).
4 Native Ways to Lock Files and Folders on Windows 10
Recently my boss asked me to lend him my external hard disk (for reasons which can’t be explained).
 Top 6 Ways to Fix Spotify Local Files Not Showing on Windows 11
Spotify is a popular digital music streaming service available for Windows.
Top 6 Ways to Fix Spotify Local Files Not Showing on Windows 11
Spotify is a popular digital music streaming service available for Windows.
 Top 7 Ways to Fix Unable to Rename Folders on Windows 11
Changing folder names to make them easily recognizable is an efficient way to organize the files on your computer.
Top 7 Ways to Fix Unable to Rename Folders on Windows 11
Changing folder names to make them easily recognizable is an efficient way to organize the files on your computer.
 Top 6 Ways to Fix iPhone Files Not Showing Up on PC
Cameras on iPhones keep getting better every year.
Top 6 Ways to Fix iPhone Files Not Showing Up on PC
Cameras on iPhones keep getting better every year.
 3 Solid Ways to Hide and Encrypt Files and Folders on Mac
If you’ve used a Mac long enough, you’ve surely wondered how to hide a file.
3 Solid Ways to Hide and Encrypt Files and Folders on Mac
If you’ve used a Mac long enough, you’ve surely wondered how to hide a file.
 How to Monitor the Access to Your Shared Windows Folders/Files
While talking about how to access shared Windows folder on Android the other day, I also gave a brief insight into how you can share a folder on Windows and
How to Monitor the Access to Your Shared Windows Folders/Files
While talking about how to access shared Windows folder on Android the other day, I also gave a brief insight into how you can share a folder on Windows and
 How To Easily Hide Files And Folders In Windows
If you want to hide files and folders from the eyes of other users of your computer then the process is quite simple in Windows.The technique mentioned below is not
How To Easily Hide Files And Folders In Windows
If you want to hide files and folders from the eyes of other users of your computer then the process is quite simple in Windows.The technique mentioned below is not
DID YOU KNOW
Up until September 14, 1995 domain registration was free.