The Group Policy Client Service (GPSVC) is a crucial system service that applies different group policy settings on your computer. This service runs automatically during startup, shutdown, and user account switching. However, if this service encounters issues, your Windows PC may become stuck on the ‘Please wait for the gpsvc’ screen.

Fortunately, there are several ways to fix this. Below, we have listed all the possible solutions—starting with the easiest to slightly more advanced ones as we progress—that should get your Windows PC to boot normally again.
1. Restart Your PC
Sometimes, temporary glitches with your system can cause Windows to become stuck on the ‘Please wait for the gpsvc’ screen. In most cases, you can resolve such issues by simply restarting your PC. Hence, it’s the first thing you should try.
Press Ctrl + Alt + Delete keyboard shortcut, click the power icon at the bottom-right corner, and select Restart.

If Windows does not respond to the Ctrl + Alt + Delete keyboard shortcut, press and hold the physical power button on your PC until it shuts down. Then, turn your PC back on and see if it boots normally.
2. Restart the GPSVC Service
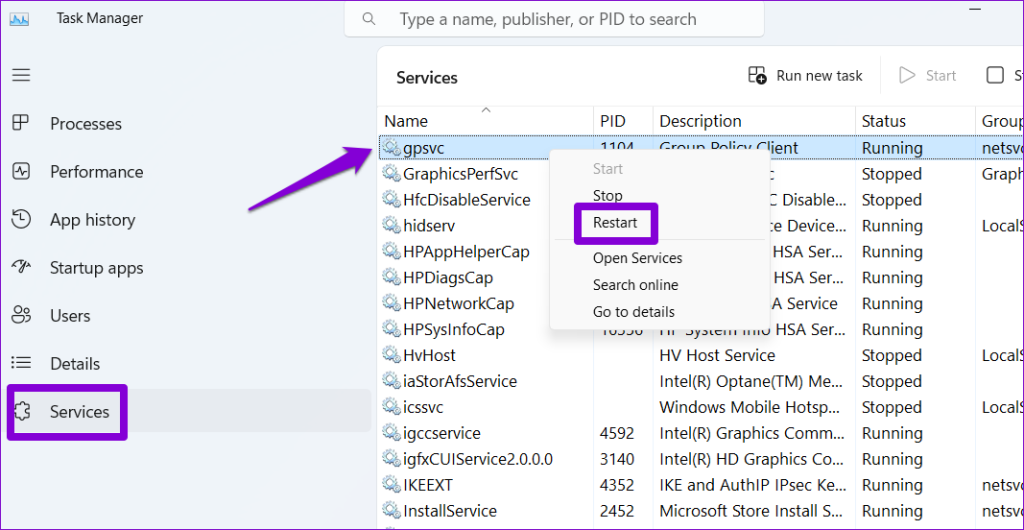
Another thing you can do to get past the ‘Please wait for the gpsvc’ screen is to restart the gpsvc service on your PC using Task Manager. Here’s how to do it.
Step 1: Press Ctrl + Alt + Delete and select Task Manager from the list.

Step 2: Switch to the Services tab and locate the gpsvc service on the list. Right-click on it and select Restart.
Try signing out and back into your account and see if you get any errors.
3. Replace the GPSVC DLL File
Issues with the gpsvc.dll file on your PC can also cause such anomalies. This usually happens when the gpsvc.dll file is corrupted or missing from your system. To fix this, you can replace the problematic DLL file manually.
If you have access to another computer running the same version of Windows as yours, you can copy the gpsvc.dll file from it. Go to the C:\Windows\System32 on that PC and copy the gpsvc.dll file.
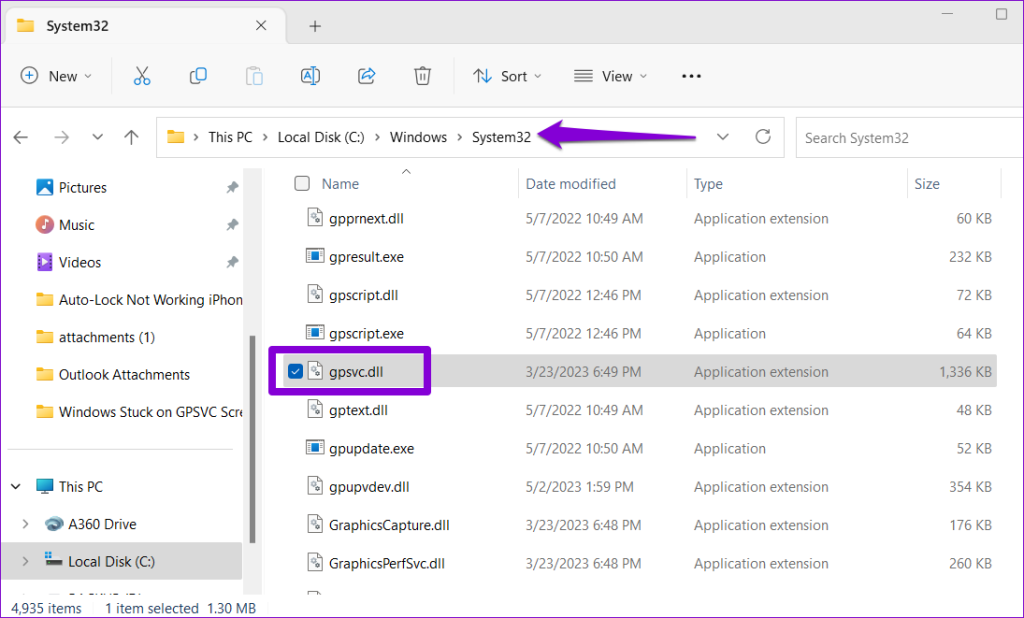
After you get the gpsvc.dll file, paste it into the C:\Windows\System32 folder on your PC.
4. Run SFC and DISM Scans
If the error persists even after you replace the gpsvc.dll file, it’s possible that some of the other system files on your PC are corrupt. To repair them, you can run the SFC (System File Checker) and DISM (Deployment Image Servicing and Management) scans on your PC.
Step 1: Press Ctrl + Alt + Delete keyboard shortcut and select Task Manager.
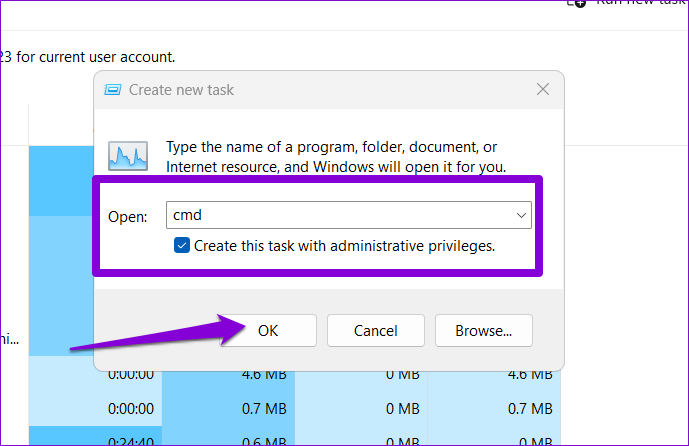
Step 2: Click the Run new task button.
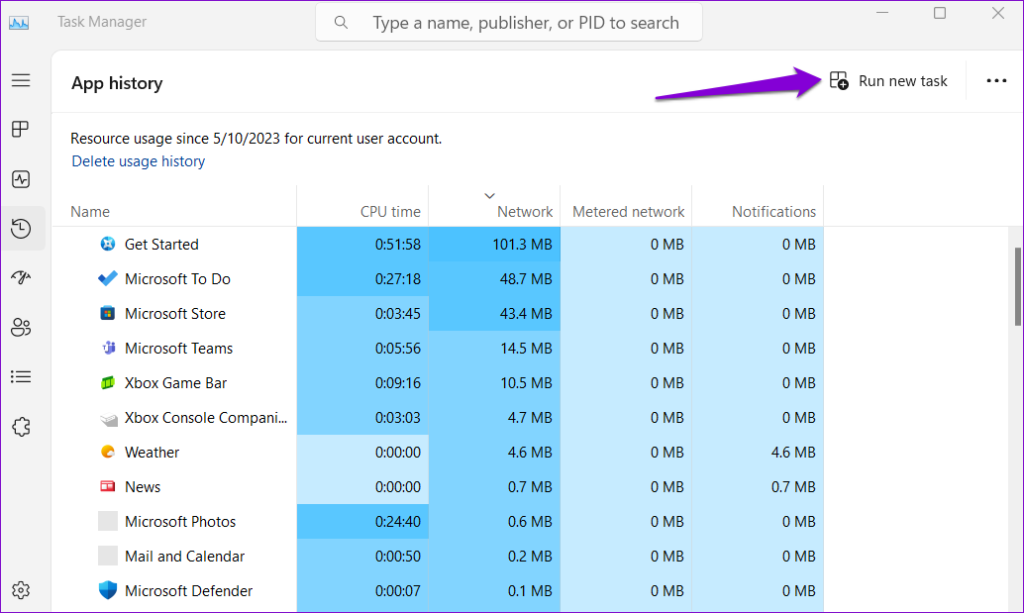
Step 3: Type cmd in the box and tick the ‘Create this task with administrator privileges’ checkbox. Then, click OK.
Step 4: In the console, type the following command and press Enter.
SFC /scannow

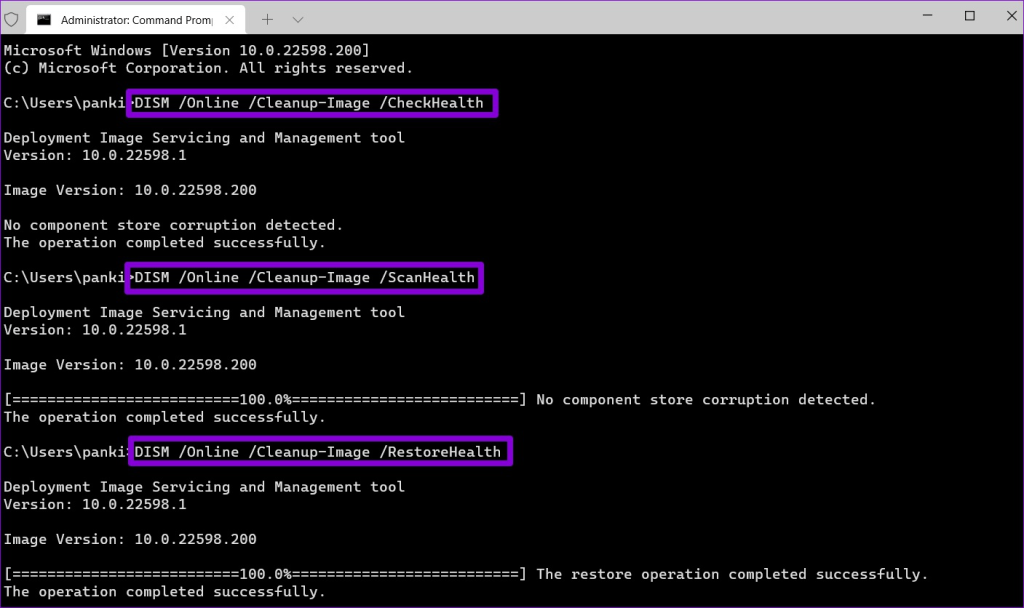
Step 5: Run the following commands one by one and press Enter after each one to run the DISM scan.
DISM /Online /Cleanup-Image /CheckHealth
DISM /Online /Cleanup-Image /ScanHealth
DISM /Online /Cleanup-Image /RestoreHealth
After running the above scans, restart your PC again and check if the issue is still there.
5. Edit Registry Files
Your Windows PC could get stuck on the ‘Please wait for the gpsvc’ screen if some of the registry files associated with GPSVC are not configured correctly. If that’s the case, you could also come across the ‘Group Policy Client Service failed the logon’ or ‘the gpsvc service failed the sign-in’ error. Here’s what you can do to fix it.
Step 1: Press Ctrl + Alt + Delete keyboard shortcut and select Task Manager.
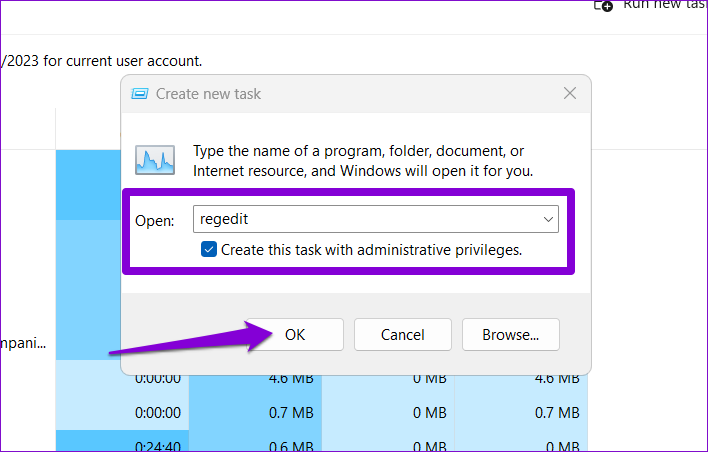
Step 2: Click the Run new task button.
Step 3: Type regedit in the box and tick the ‘Create this task with administrator privileges’ checkbox. Then, click OK.
Step 4: Paste the following path in the address bar at the top and press Enter.
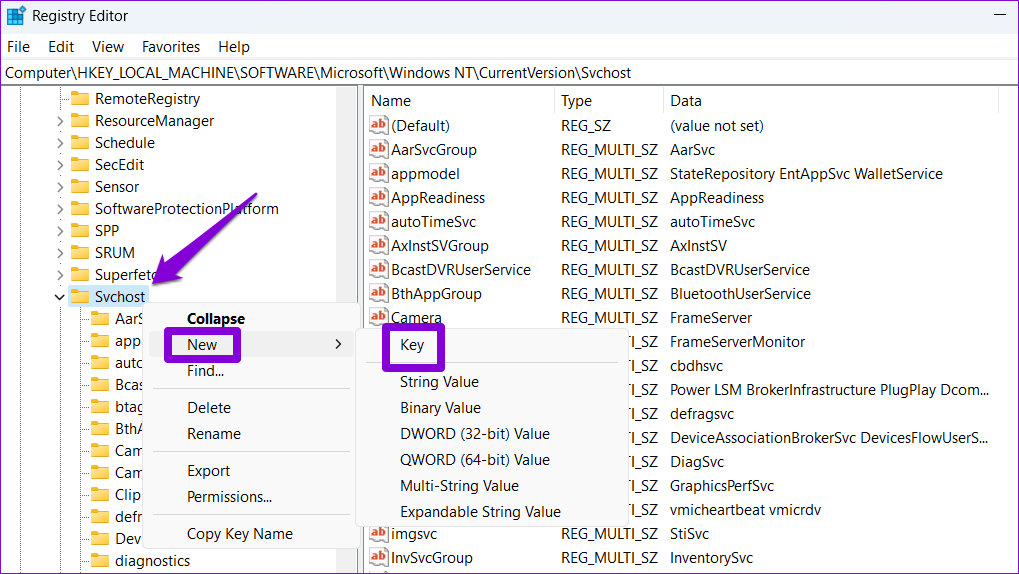
Computer\HKEY_LOCAL_MACHINE\SOFTWARE\Microsoft\Windows NT\CurrentVersion\Svchost
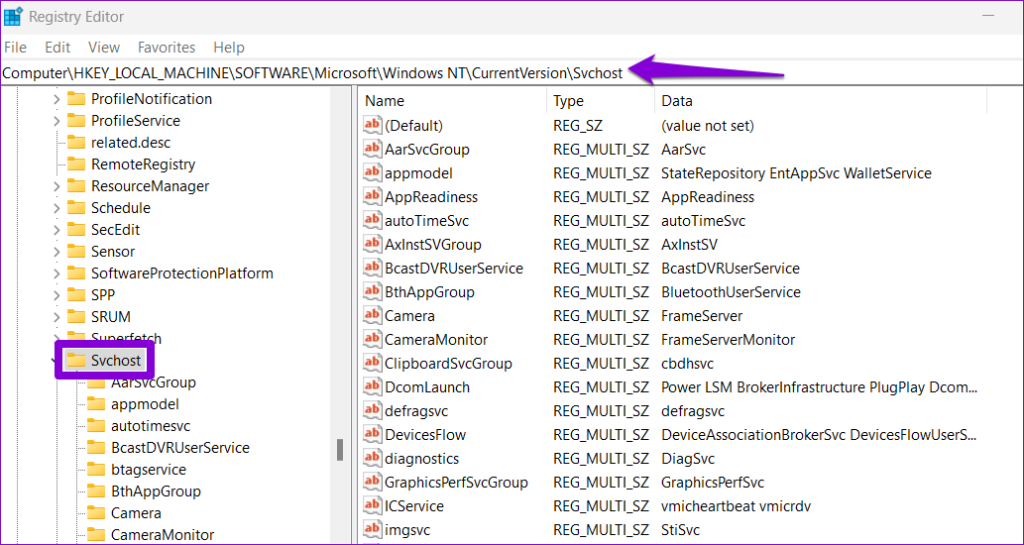
Step 5: Right-click on the Svchost key, go to New, and select Key. Name it GPSvcGroup.
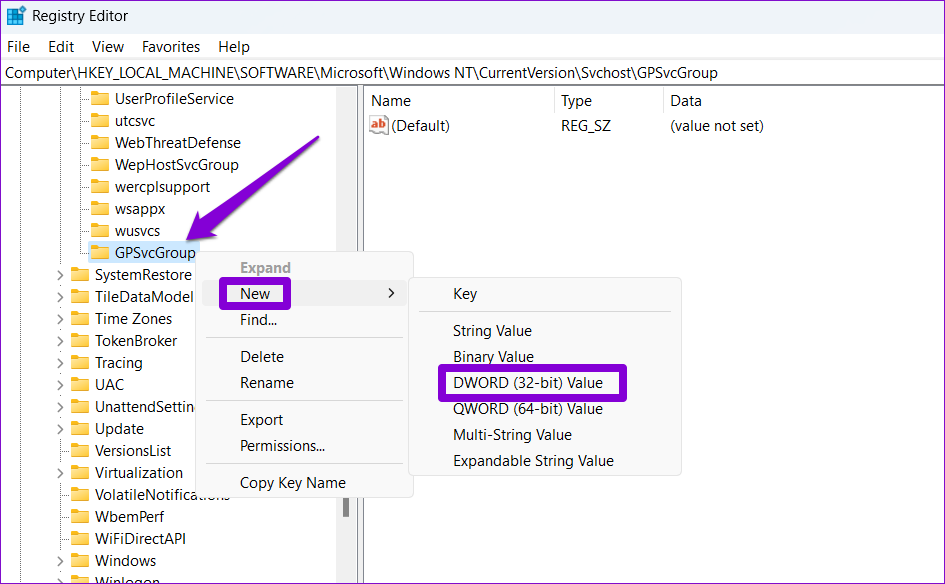
Step 6: Right-click on the GPSvcGroup key, go to New, and select DWORD (32-bit) Value. Name it AuthenticationCapabilities. Similarly, create another DWORD and name it CoInitializeSecurityParam.
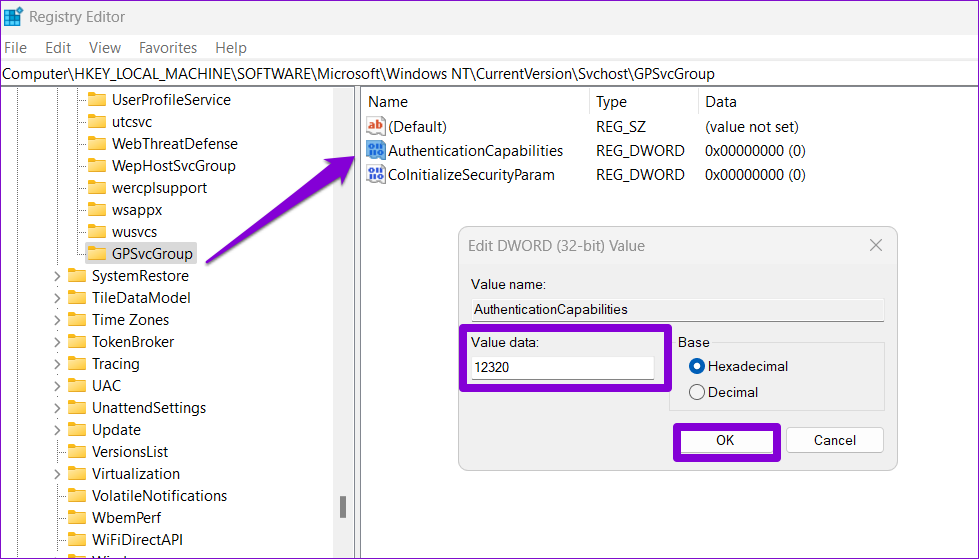
Step 7: Double-click the AuthenticationCapabilities DWORD, enter 12320 in the Value data field, and hit OK.
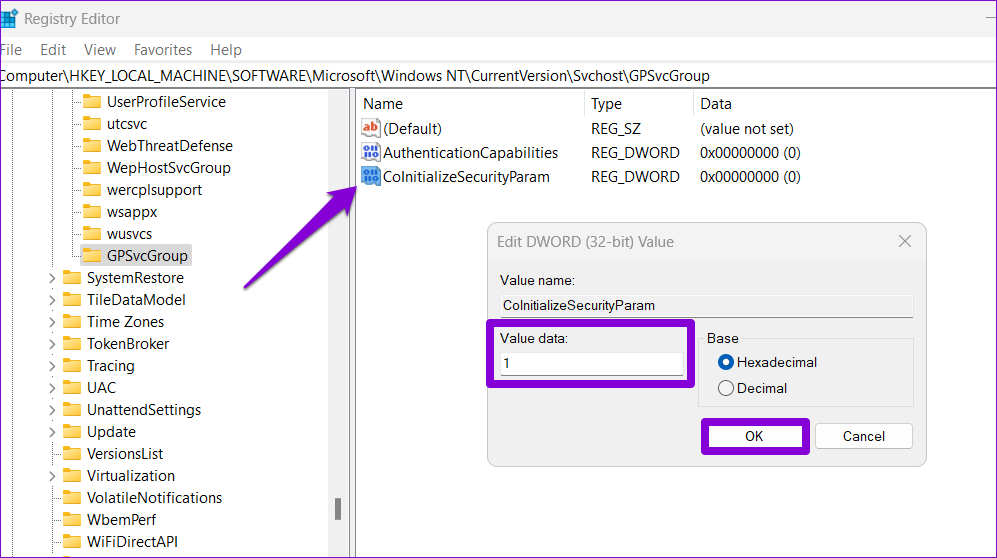
Step 8: Double-click the CoInitializeSecurityParam DWORD, enter 1 in the Value data field, and hit OK.
Restart your PC after this for changes to take effect and see if you still get errors.
6. Perform a System Restore
System Restore is a useful utility that periodically takes a snapshot of your entire system, giving you the option to revert your PC to a previous state and undo changes made since that point. If none of the above tips help, you can perform a system restore to move back to a point before the issue first occurred.
Step 1: Press Ctrl + Alt + Delete keyboard shortcut and click the power icon at the bottom-right corner. Press and hold the shift key and select Restart.
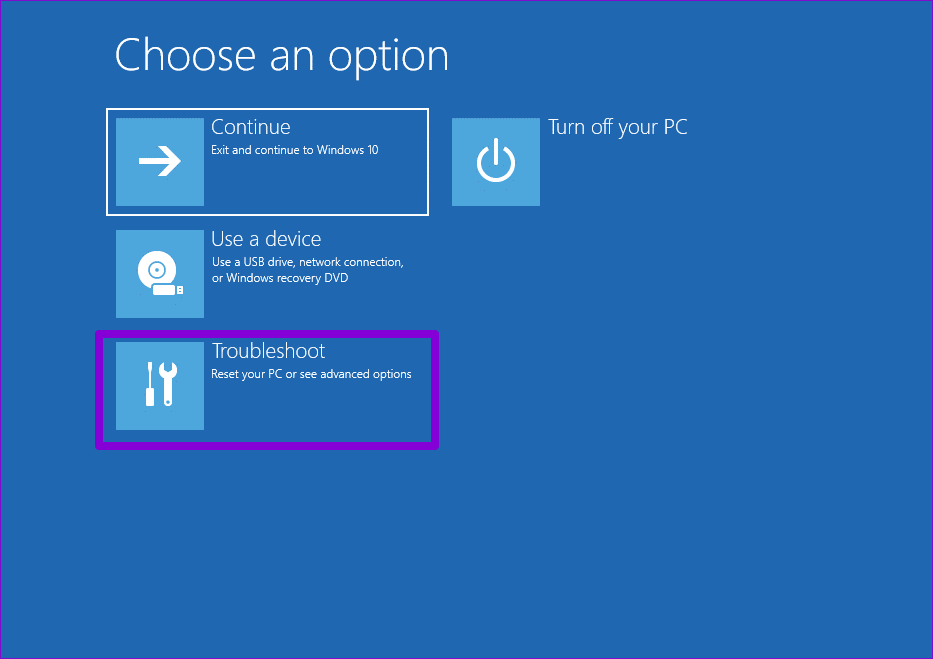
Step 2: Wait for your PC to restart and select the Troubleshoot option.
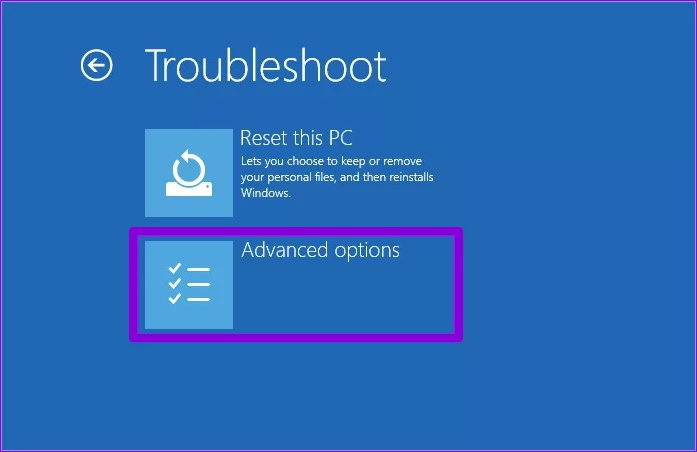
Step 3: Click Advanced options.
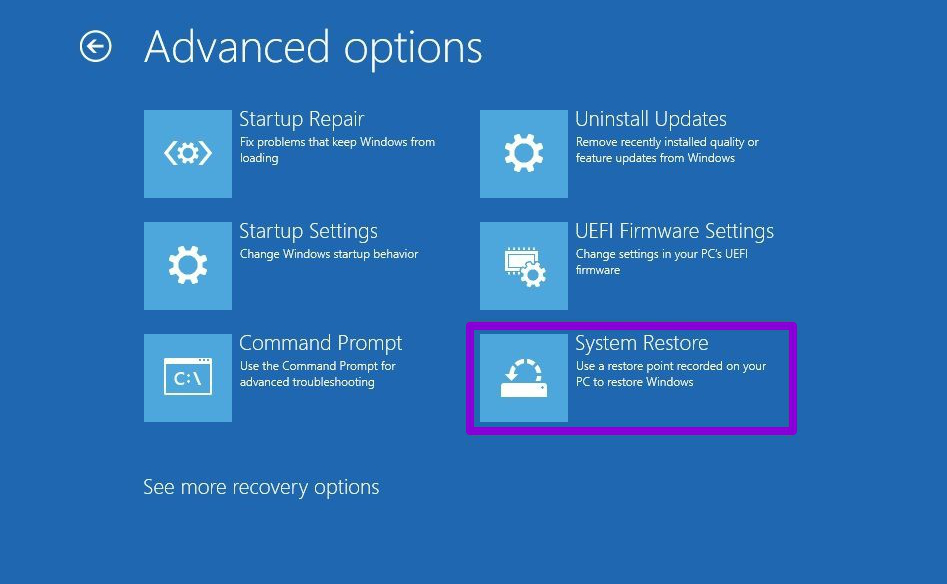
Step 4: Select the System Restore option.
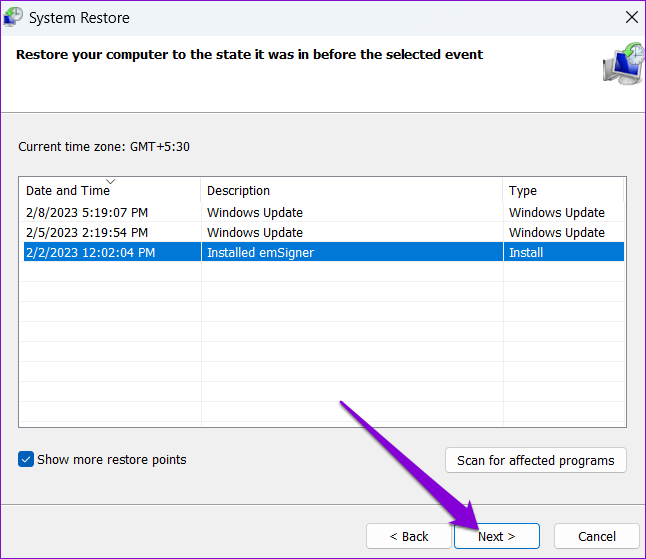
Step 5: Select your preferred restore point and click Next.
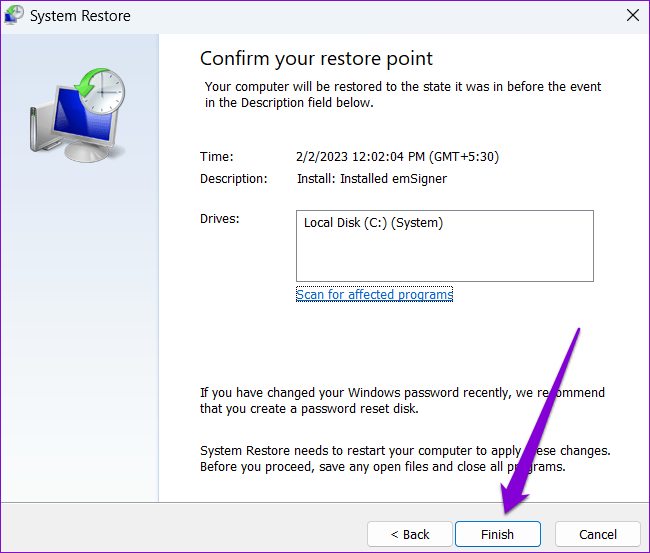
Step 6: Review all the details and click Finish.
No More Waiting
It can be annoying when messages like the ‘Please wait for the gpsvc’ on Windows keep you waiting while booting or shutting down your PC. We hope that one of the above tips has helped fix the gpsvc service and restored your Windows PC’s usual startup or shutdown operations.
Last updated on 09 June, 2023
The above article may contain affiliate links which help support Guiding Tech. However, it does not affect our editorial integrity. The content remains unbiased and authentic.
Read Next
 Top 5 Ways to Fix Windows 10 Stuck on Welcome Screen
It’s common for Windows computers to get stuck during usage or on either end of the power spectrum—startup and shutdown.
Top 5 Ways to Fix Windows 10 Stuck on Welcome Screen
It’s common for Windows computers to get stuck during usage or on either end of the power spectrum—startup and shutdown.
 Top 6 Ways to Fix Windows 11 Stuck on Restarting Screen
Is your Windows 11 PC stuck at restarting screen?
Top 6 Ways to Fix Windows 11 Stuck on Restarting Screen
Is your Windows 11 PC stuck at restarting screen?
 Top 7 Ways to Fix Discord Stuck on Connecting on Windows 10 and Windows 11
Very few VoIP (Voice Over IP) services have grown as rapidly as Discord.
Top 7 Ways to Fix Discord Stuck on Connecting on Windows 10 and Windows 11
Very few VoIP (Voice Over IP) services have grown as rapidly as Discord.
 Top 8 Ways to Fix Microsoft Excel Stuck at Starting on Windows 11 and Windows 10
While Microsoft’s spreadsheet app is feature-rich, it feels bloated and overwhelming at times.
Top 8 Ways to Fix Microsoft Excel Stuck at Starting on Windows 11 and Windows 10
While Microsoft’s spreadsheet app is feature-rich, it feels bloated and overwhelming at times.
 5 Ways to Fix Windows 10 Full Screen Start Menu Stuck Issue
The Start Menu on Windows has had a long journey.
5 Ways to Fix Windows 10 Full Screen Start Menu Stuck Issue
The Start Menu on Windows has had a long journey.
 Top 6 Ways to Fix iPhone Gets Stuck on Search Screen
The search feature on iPhone lets you look for information without actually opening any particular app for contacts, notes, and other items.
Top 6 Ways to Fix iPhone Gets Stuck on Search Screen
The search feature on iPhone lets you look for information without actually opening any particular app for contacts, notes, and other items.
 Top 9 Ways to Fix Android TV Stuck on Loading Screen
Android TV is gaining market share in the smart TV space.
Top 9 Ways to Fix Android TV Stuck on Loading Screen
Android TV is gaining market share in the smart TV space.
 Top 7 Ways to Fix Microsoft Office Stuck on Getting Things Ready in Windows 11
Is the Microsoft Office installation stuck on the 'we're getting things ready' screen?
Top 7 Ways to Fix Microsoft Office Stuck on Getting Things Ready in Windows 11
Is the Microsoft Office installation stuck on the 'we're getting things ready' screen?
DID YOU KNOW
Windows Hello is a biometric authentication feature in Windows 10.